AUGUST NON ENGINE SWAP RELATED PROGRESS


Well, in the non engine swap department....August was all about the front brakes and related components.....

Here is the stock 9.4'' solid rotor blissfully unaware that it's days are numbered ...somehow oblivious to the shiny new suspension bits that can only mean a new and better brake setup is a comin'....

augustns001 (54K) augustns007 (50K)
augustns002 (30K)
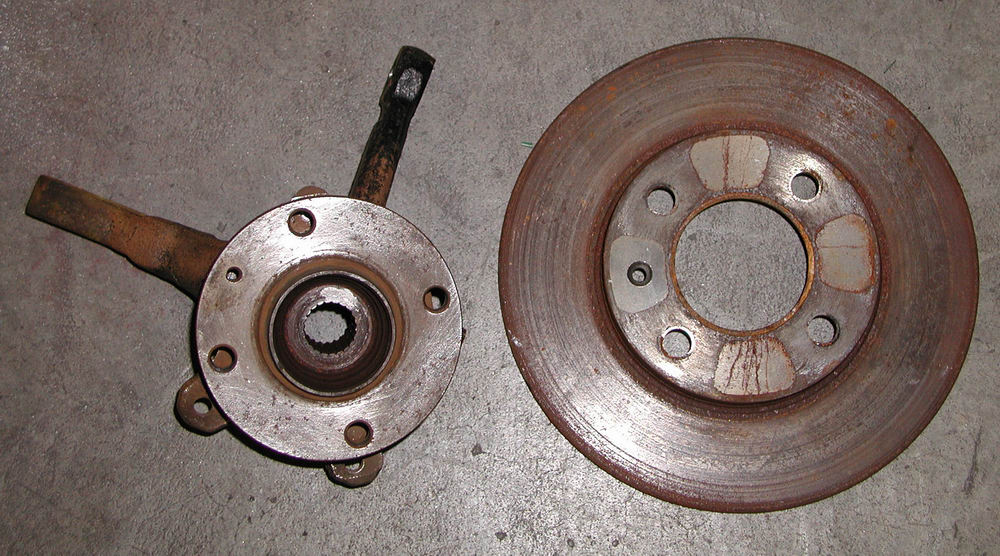
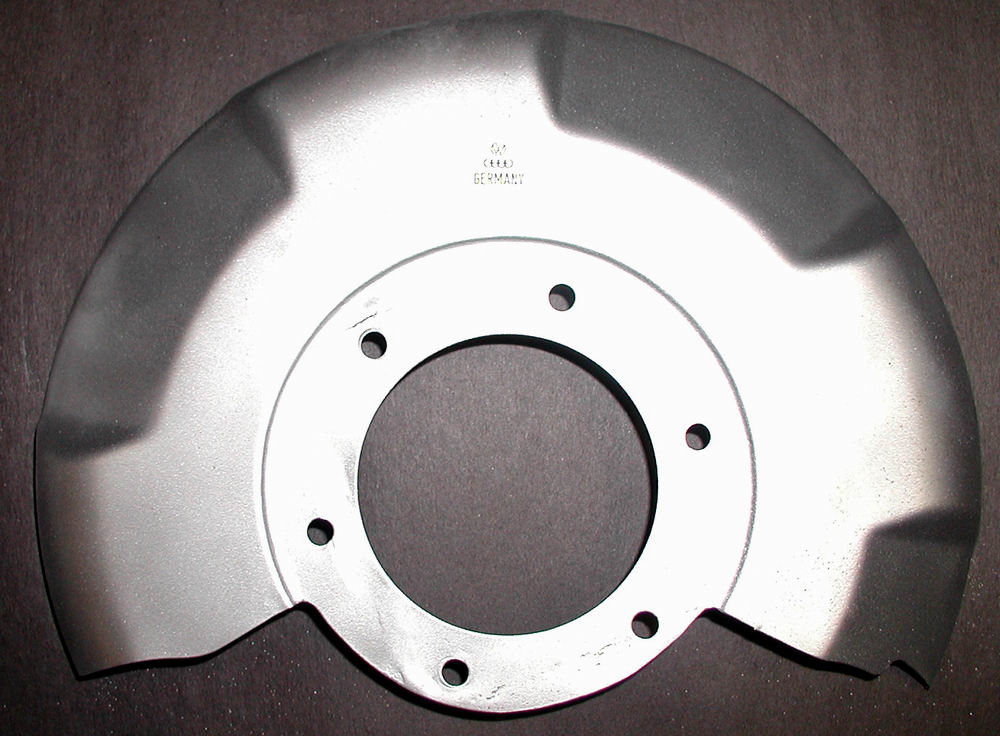
 at least it will have company in the dumpster...

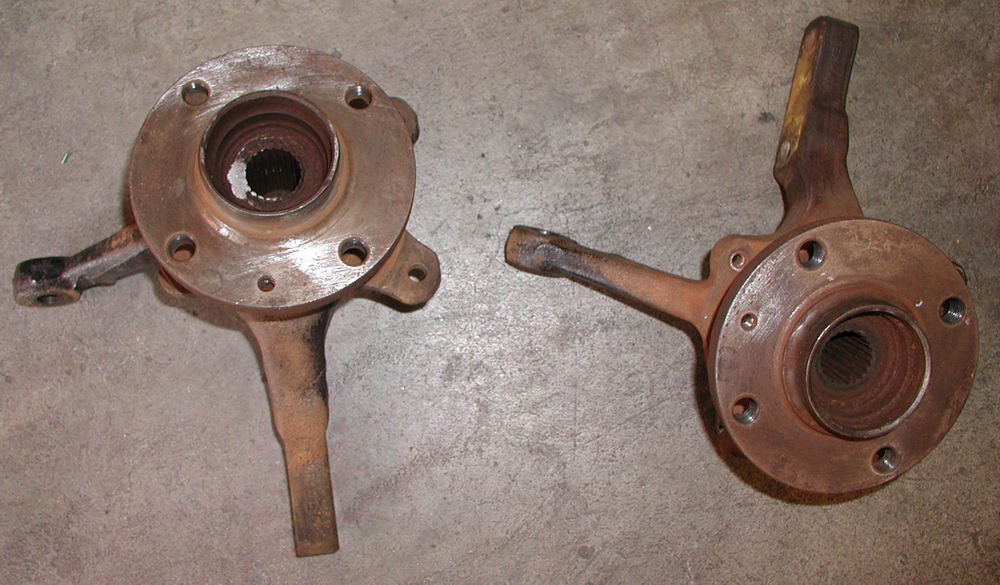
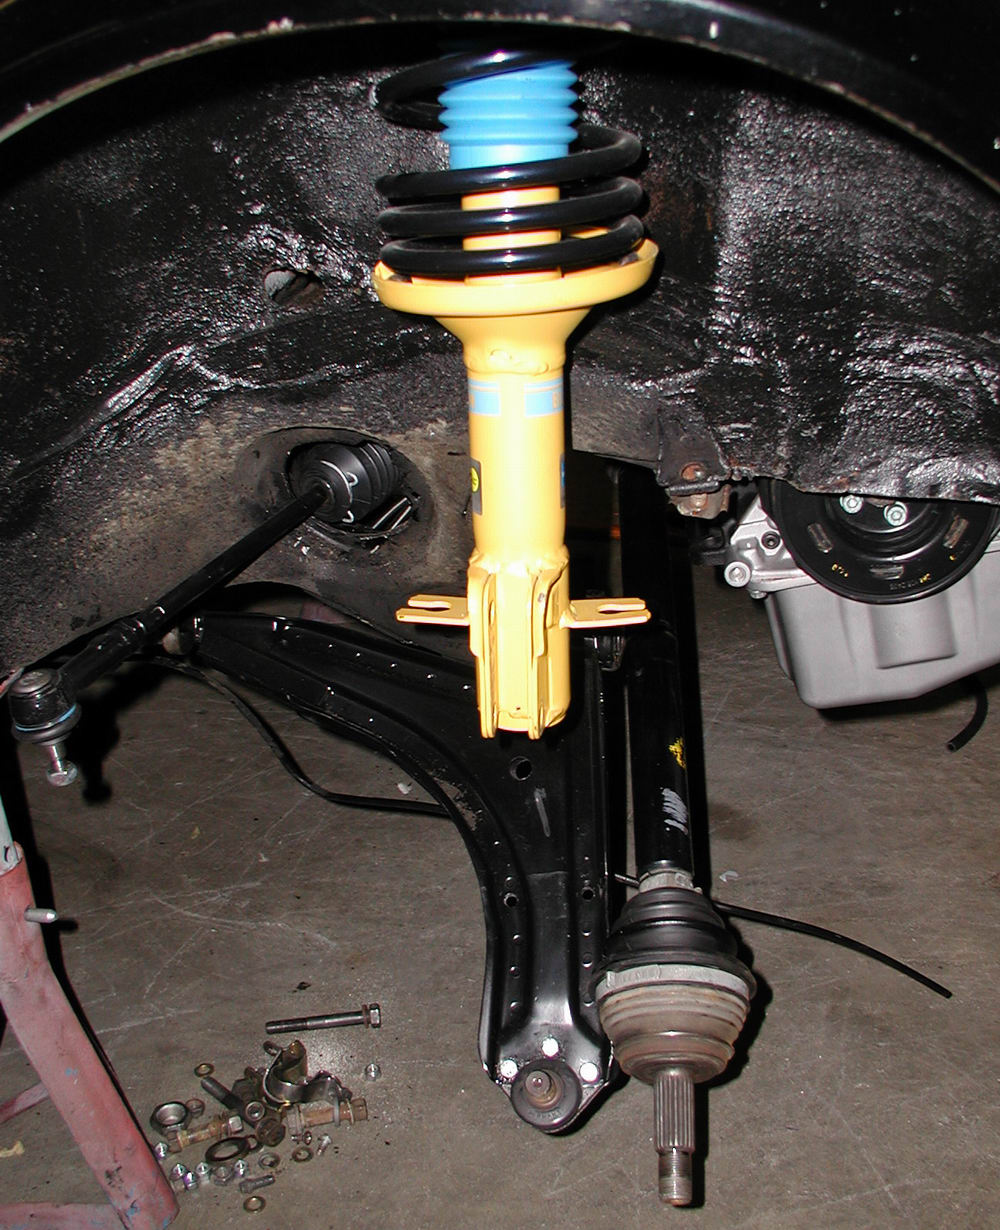
 Since Shocky was now sporting spiffy 16V 100 mm drive axles
 instead of his stock 90 mm, the old hub carriers were also slated
 to go

To start things off, the stock dust shields were cut back to fit the larger calipers.   I wasn't on the ball enough to get a picture of the dust shield before it was cut, however while in the middle of bead blasting, Dan and I realized we were slacking on pictures and settled for a pic of one of the shields in a half bead blasted state...

(man...I LOVE media blasting cabinets!!)

augustns004 (24K) augustns003 (26K)
augustns005 (25K)
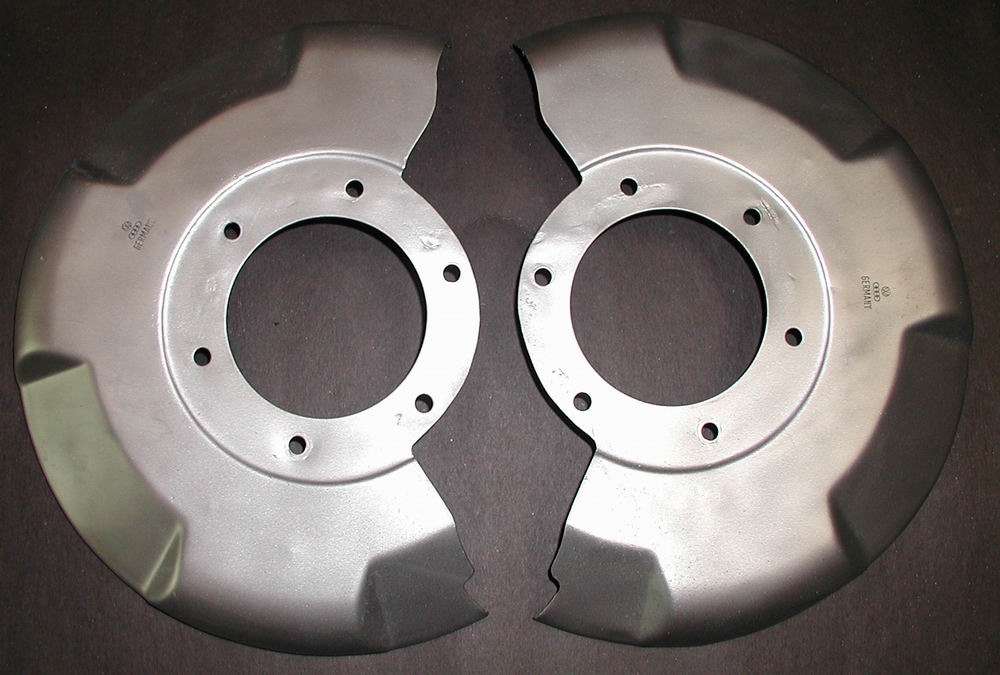
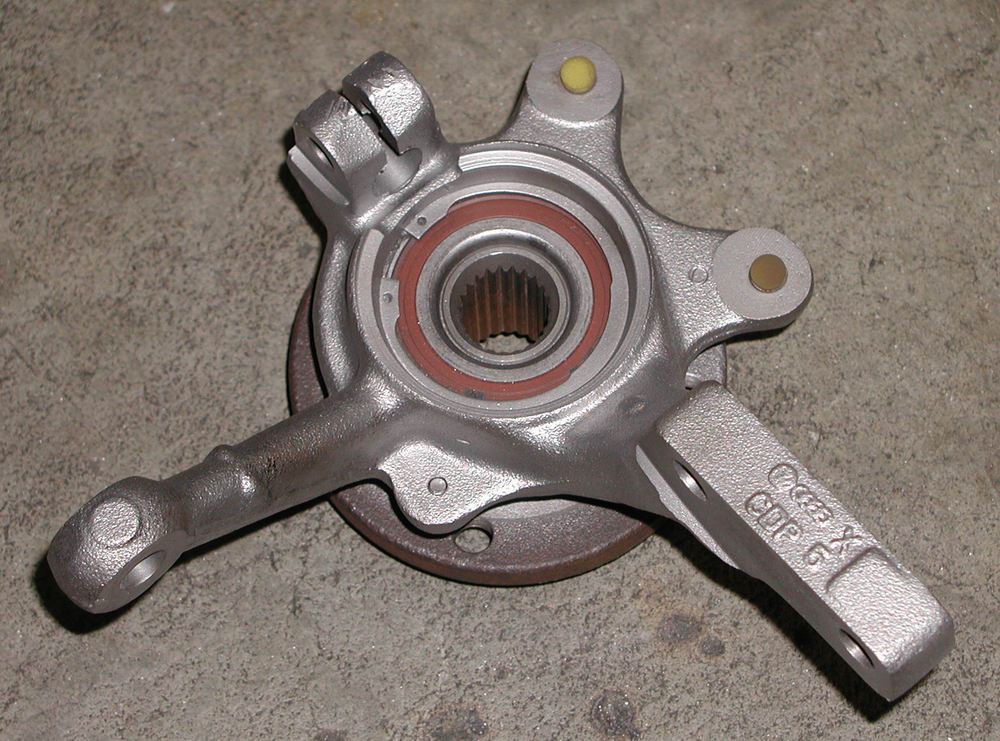
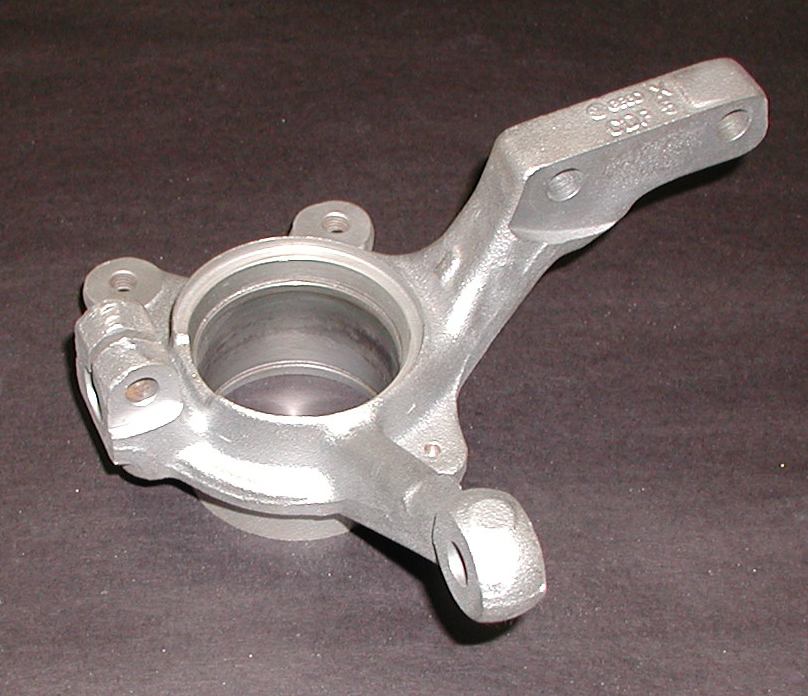
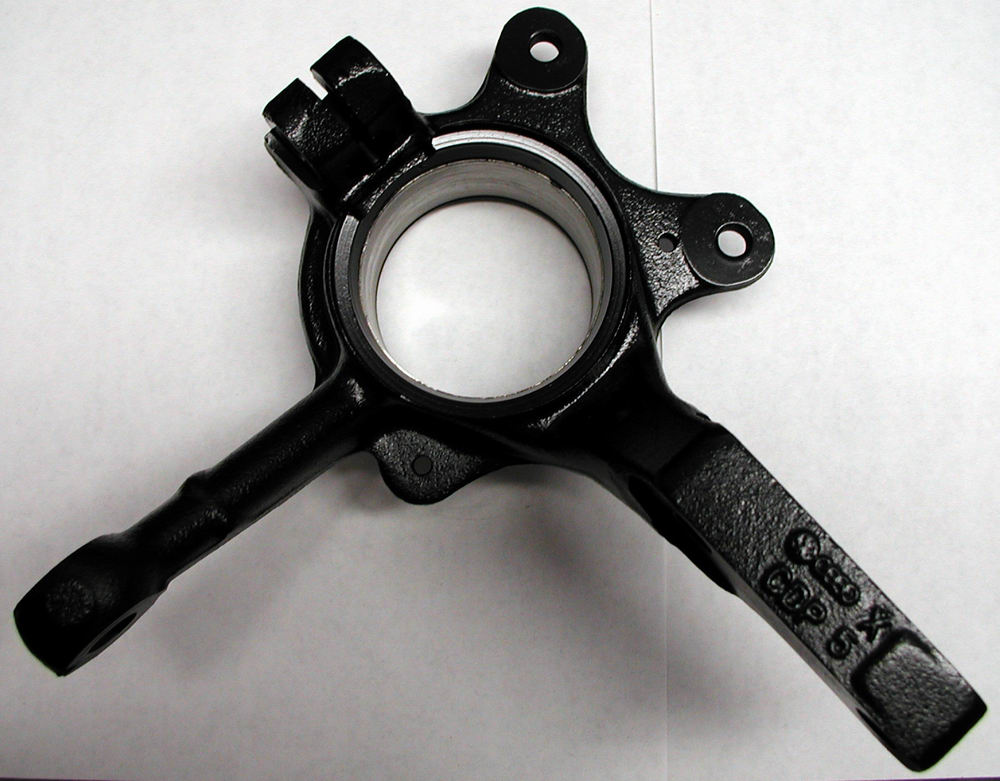
 ...after the bead blasting and before paint
augustns008 (33K)
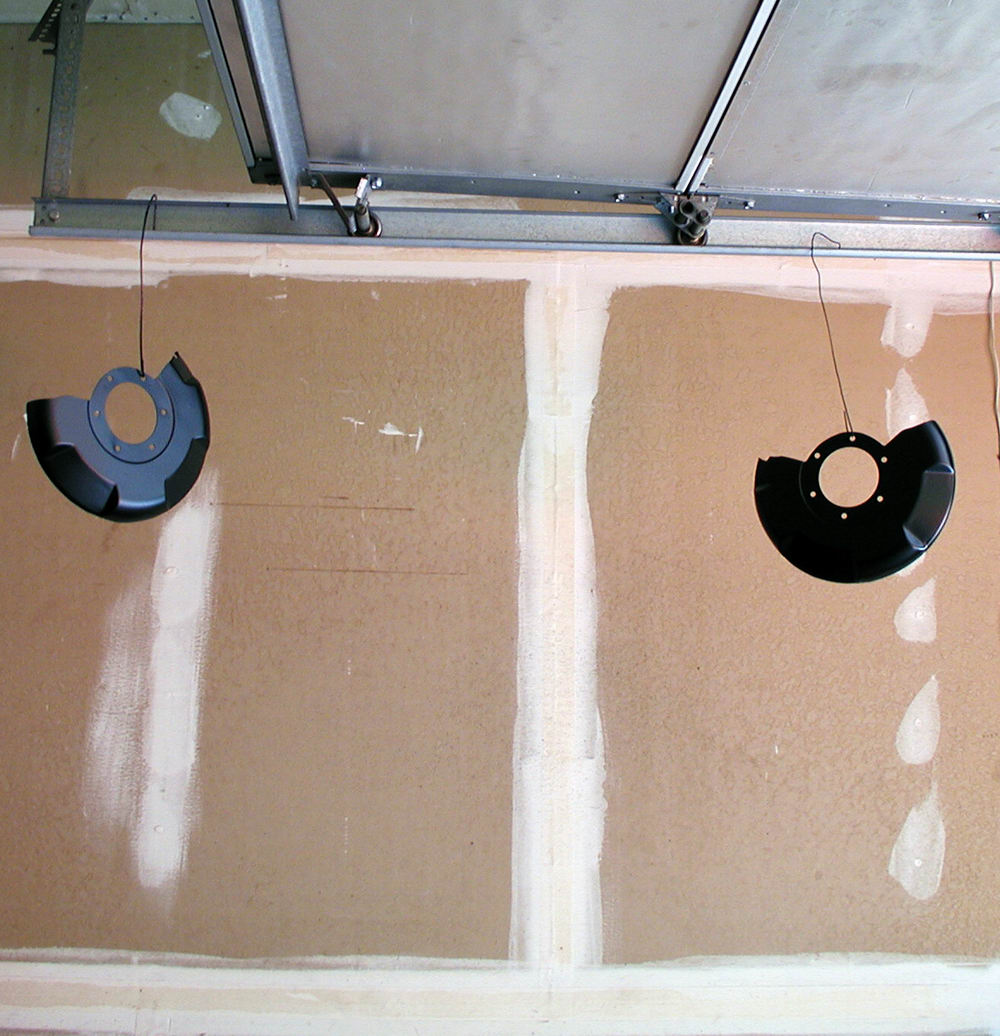
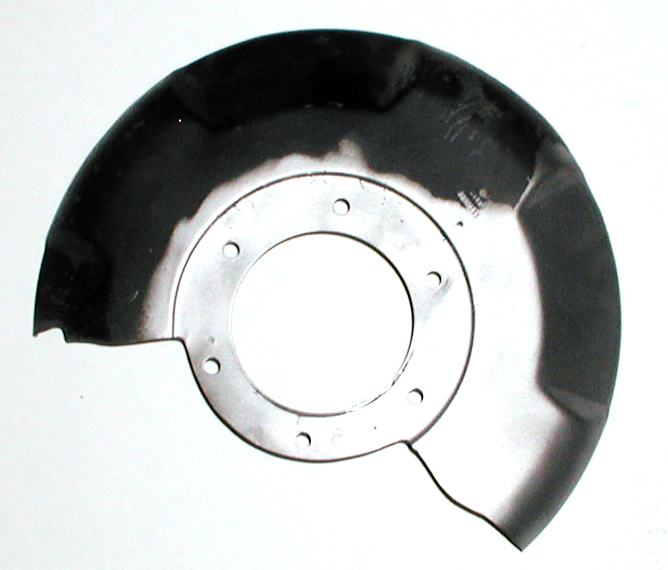
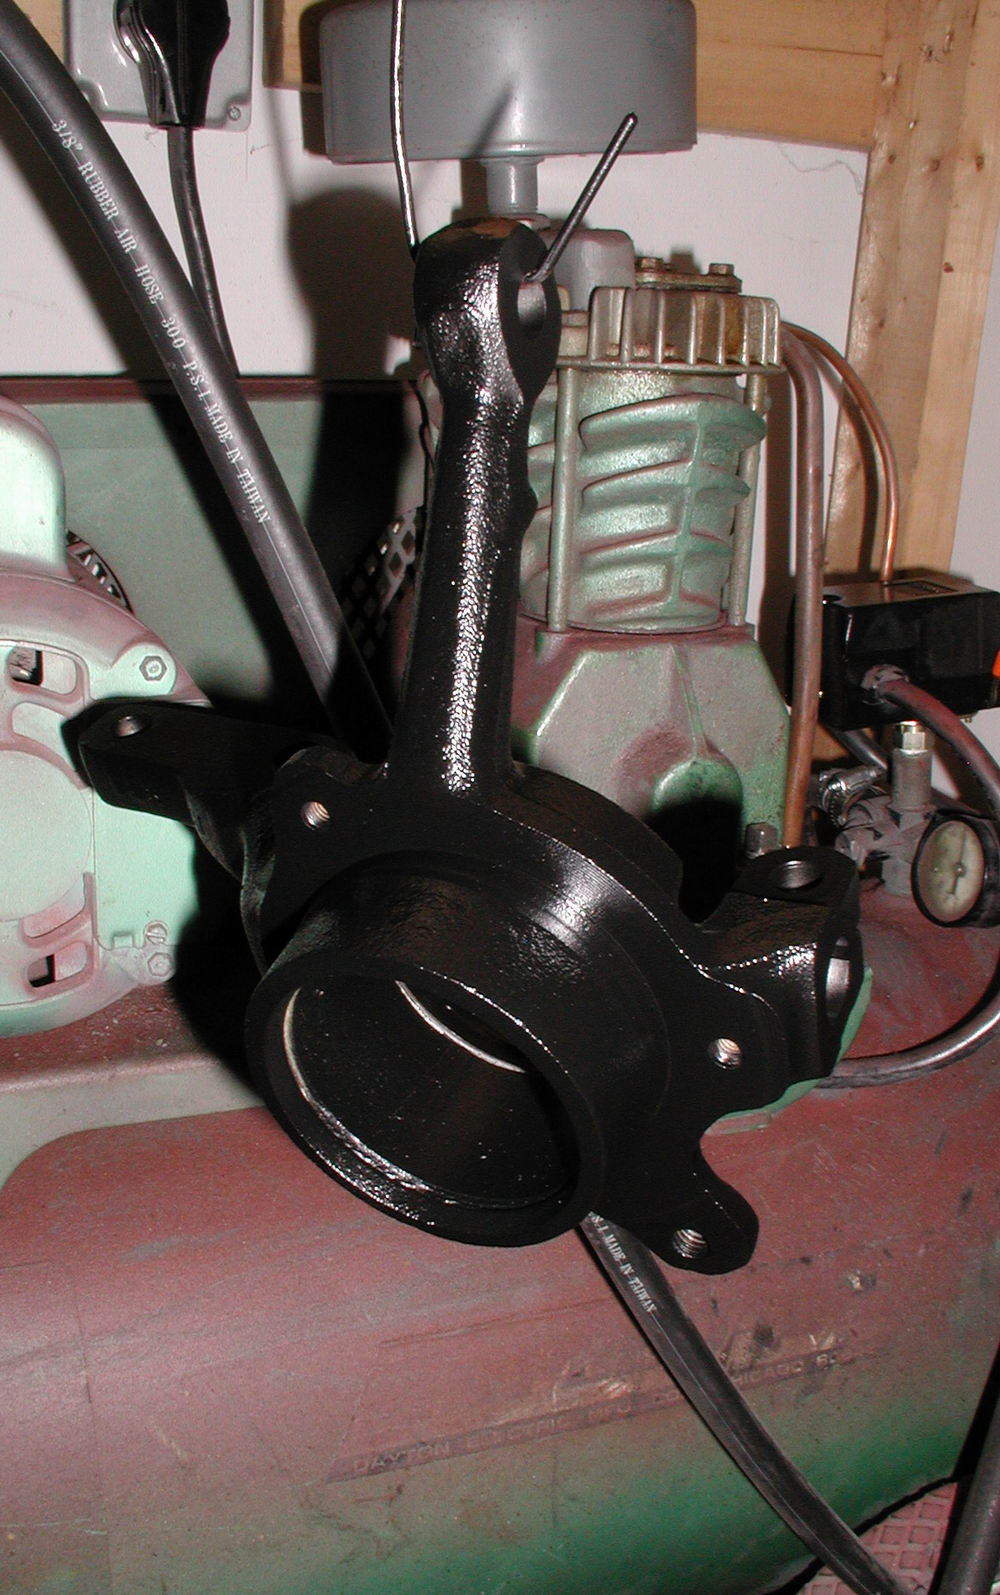
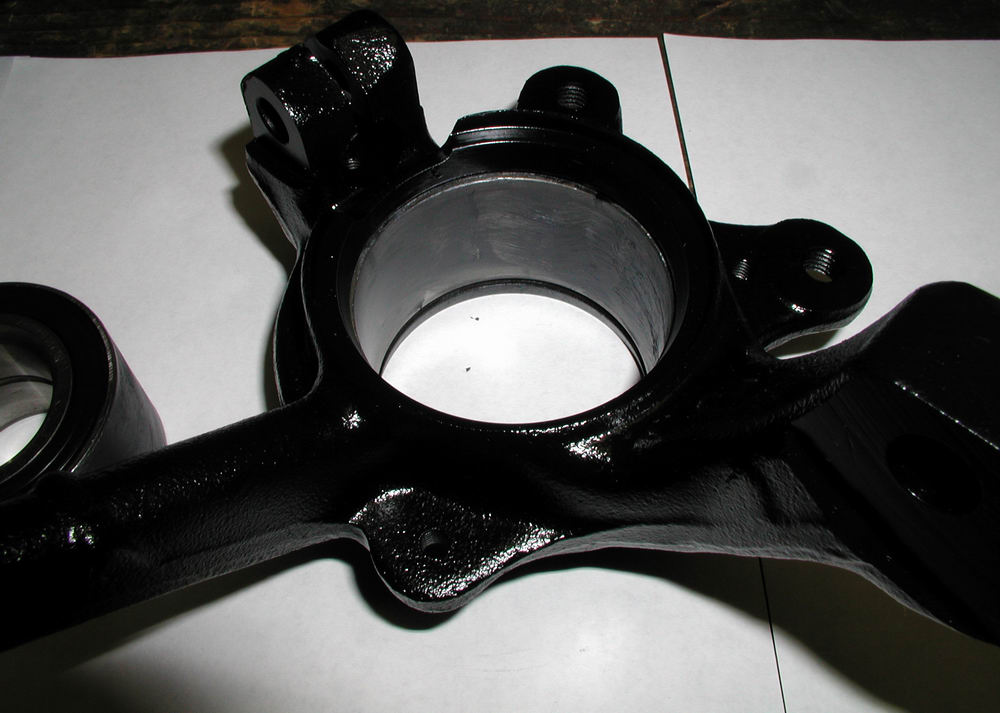
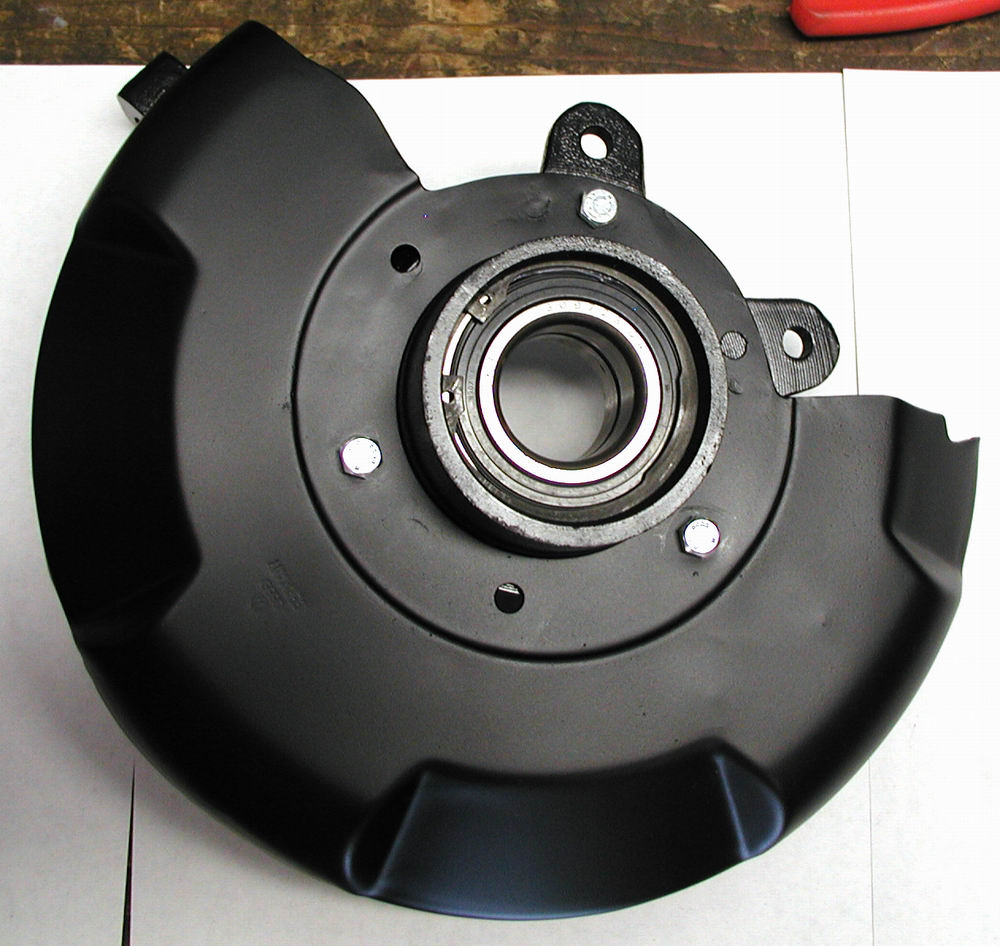
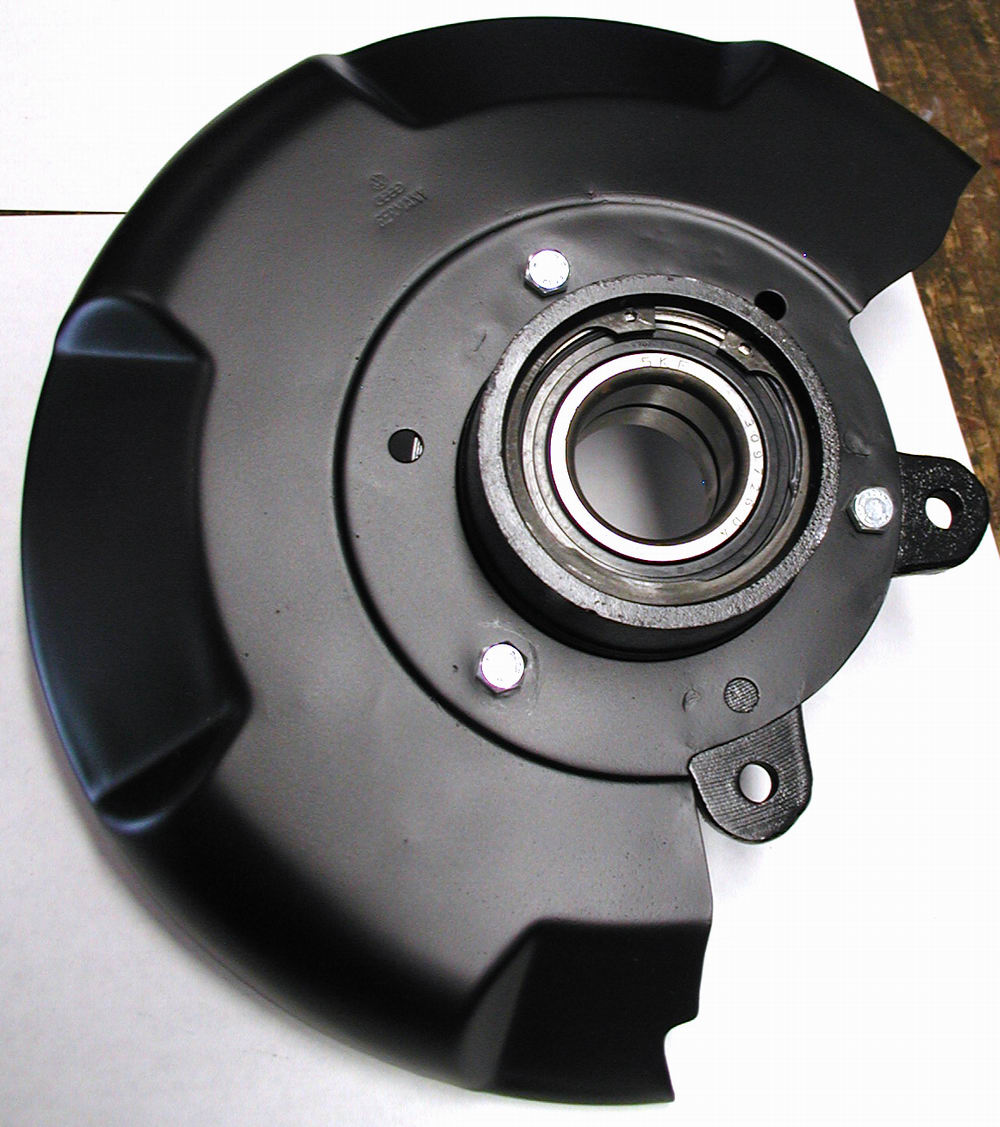
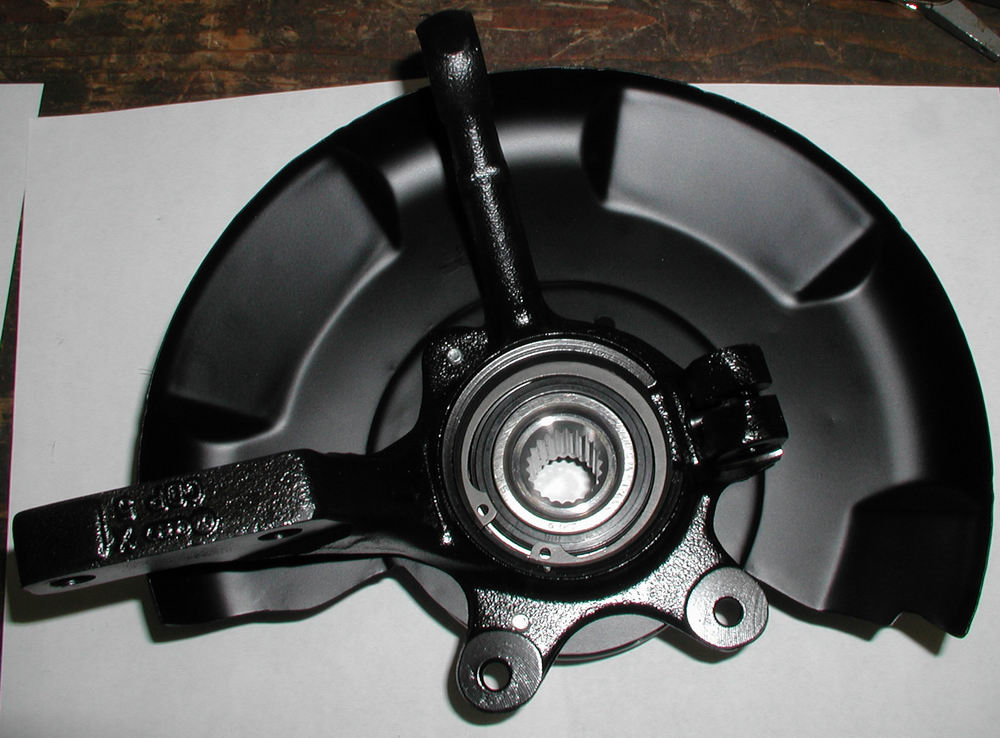
  ...a coat or two of engine enamel (low-gloss black) and the dust
  shields are set out to dry...

Initially the plan was to use Shocky's old hubs, however upon closer inspection I discovered that one of them was damaged and decided to just go ahead and order new ones instead.

augustns009 (37K)
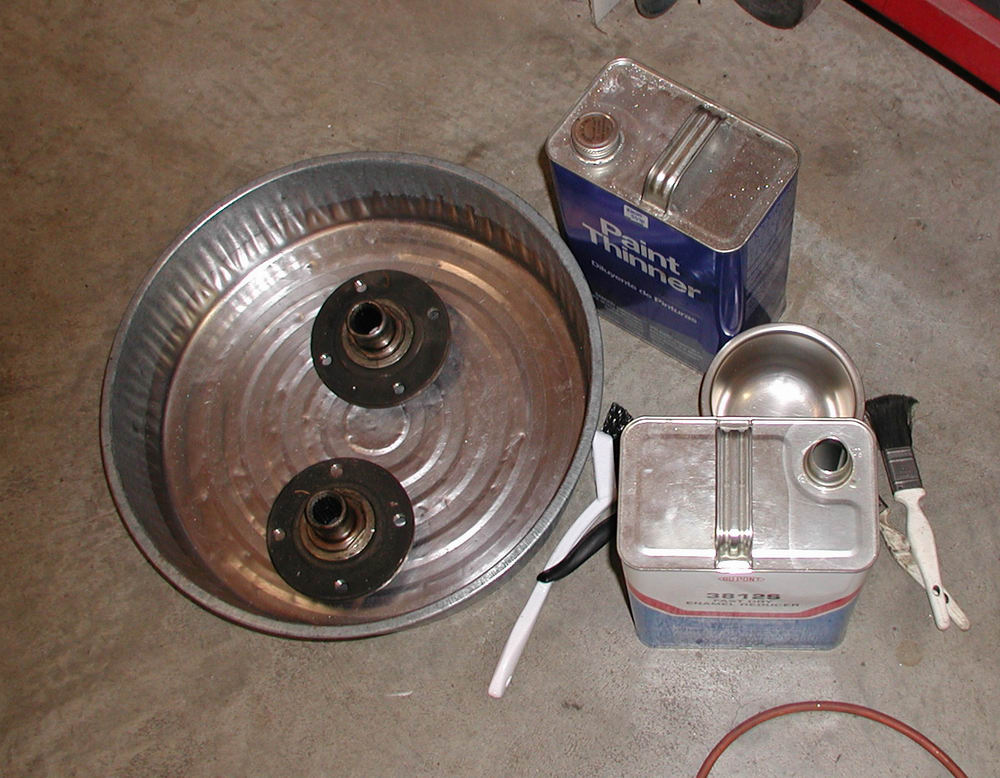
 ....no paint thinner this time since new hubs were on the way
augustns010 (32K)
  VERY HOT!  

  (did I mention my second love is metal....after Sciroccos of
  course )

Well, they didn't start out looking too hot...but these are the "new" hub carriers from the 16V parts car.  You need to upgrade the hub carriers when you go from 90 mm to 100 mm drive axles.

augustns006 (28K)
 um...yeah...I hate rust.....
augustns011 (40K) augustns012 (39K)
augustns013 (58K)
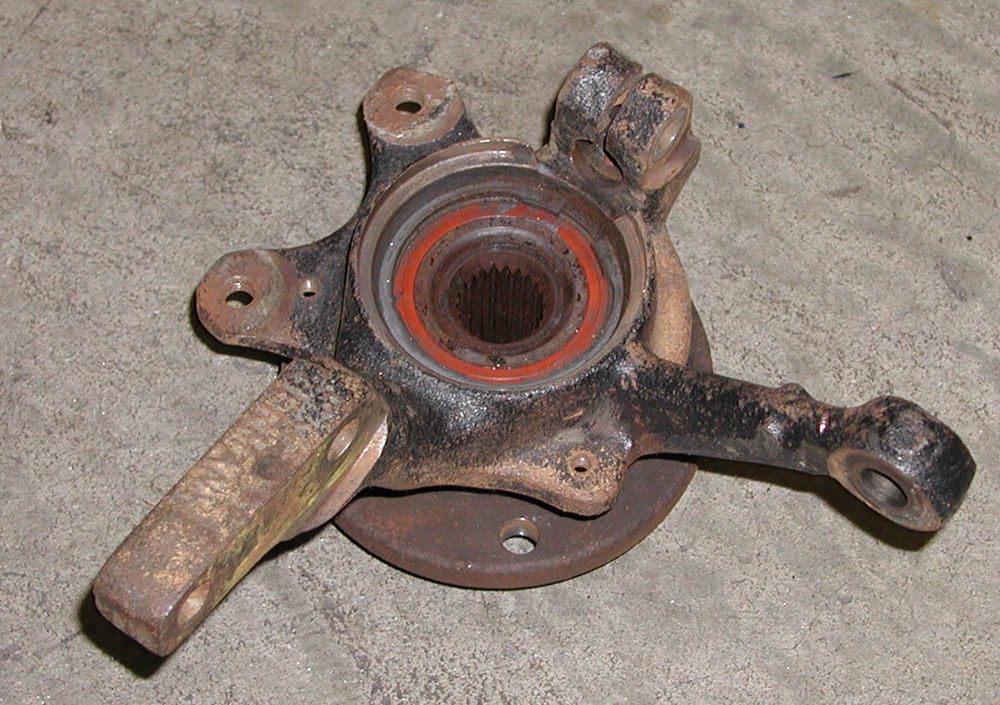
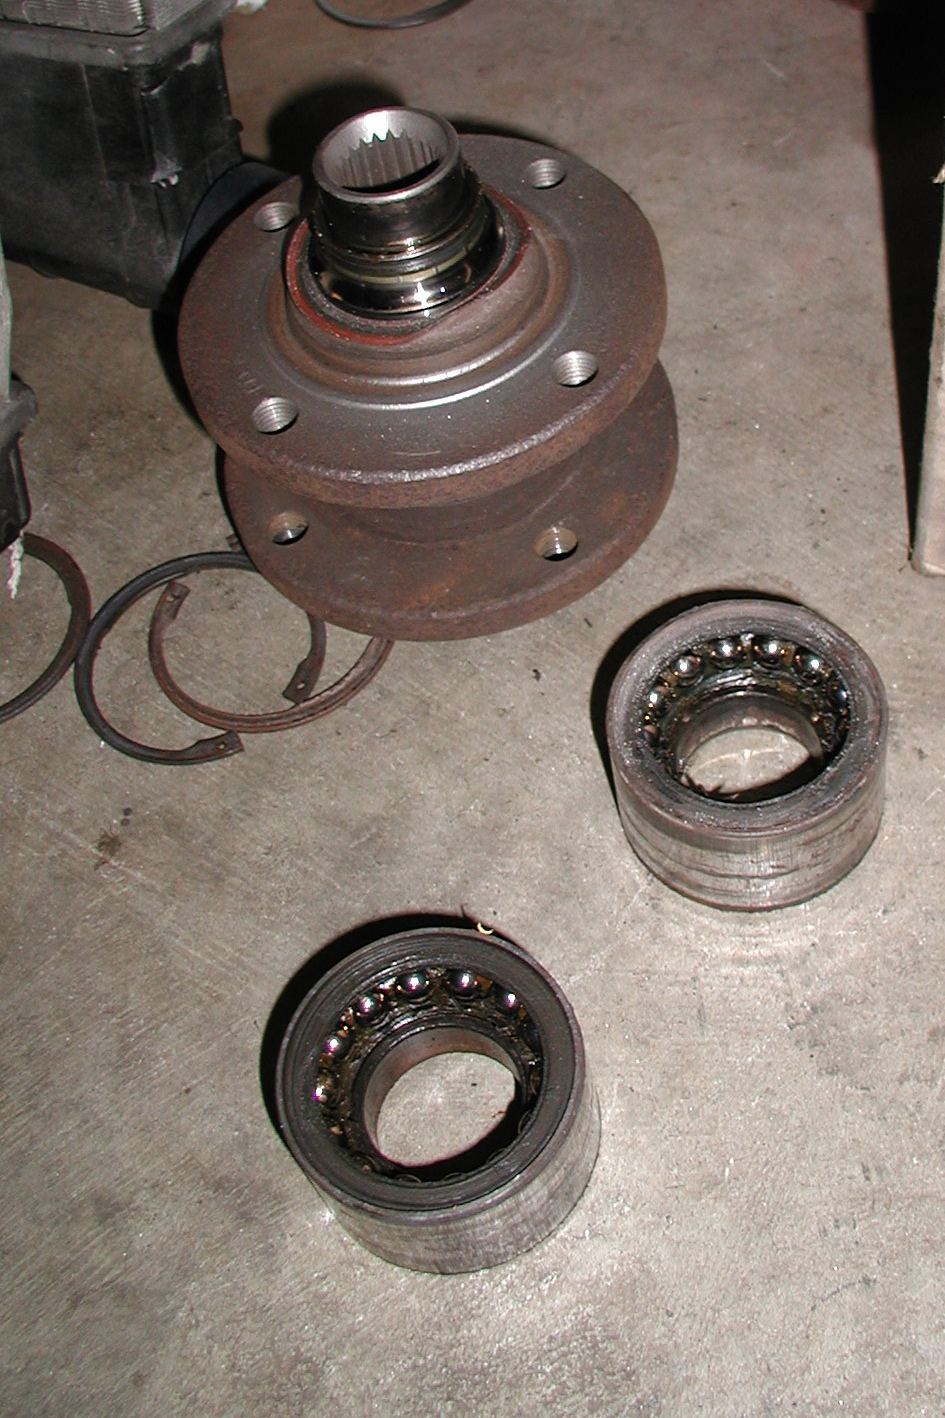
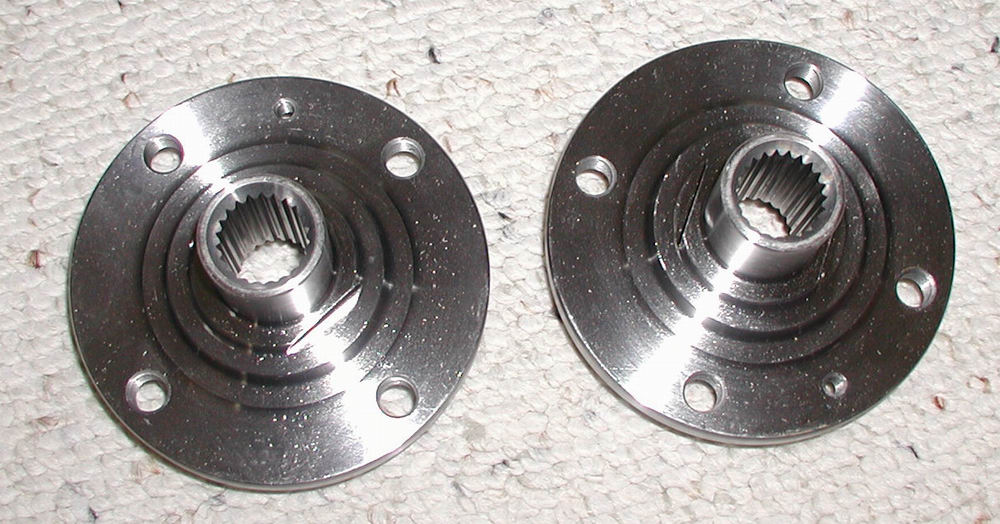
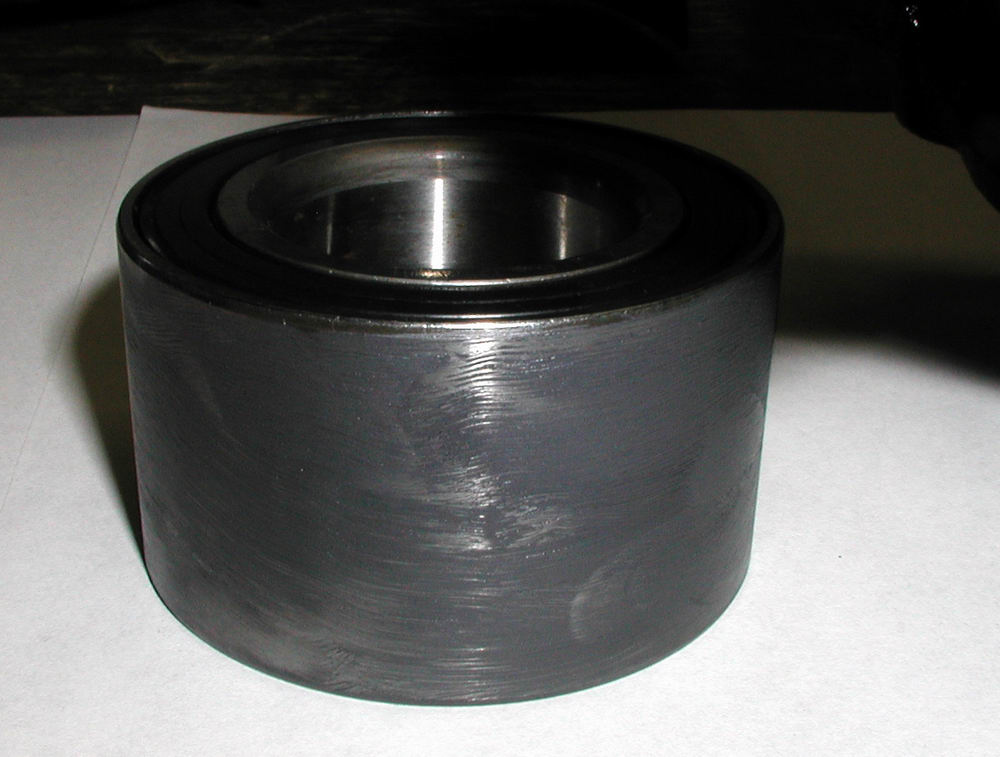
 ahhh....once again....media blaster to the rescue!


 And here are the old bearings and hubs from the 16V hub
 carriers.....

Well, considering what it started out looking like...not too bad of a clean up.  After cleaning the glass beads off of the carriers, it is paint time:

augustns014 (32K)

augustns015 (31K)
augustns016 (57K)

To help press in the bearings and hubs, I brought some DOM and 6061 tubing from work to use with the hydraulic press.  Dan and I had selected the two tubes by matching the OD of the tubing to the ID of the wheel bearing and hub, choosing a suitable wall thickness for using with the press.  As to be expected they had many a burr on either end...but not to worry!  I took care of that........

**  Incidentally, if you should find yourself in need of any metal....  OnlineMetals.com **

augustns018 (40K)
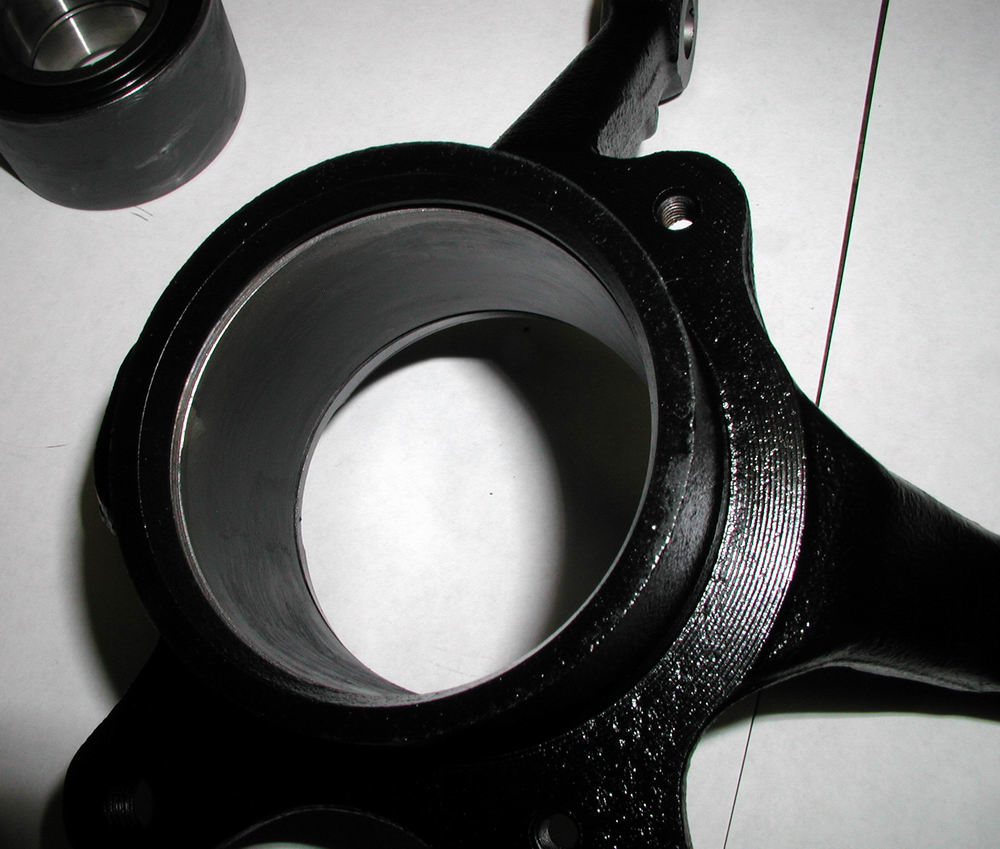
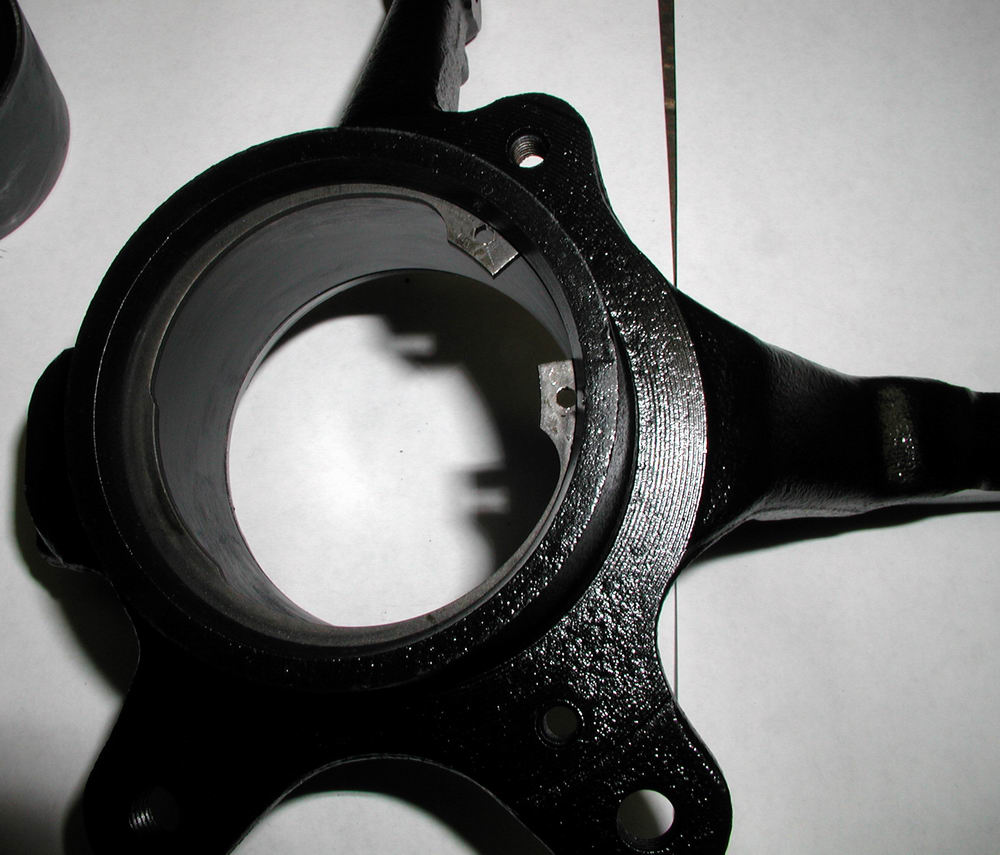
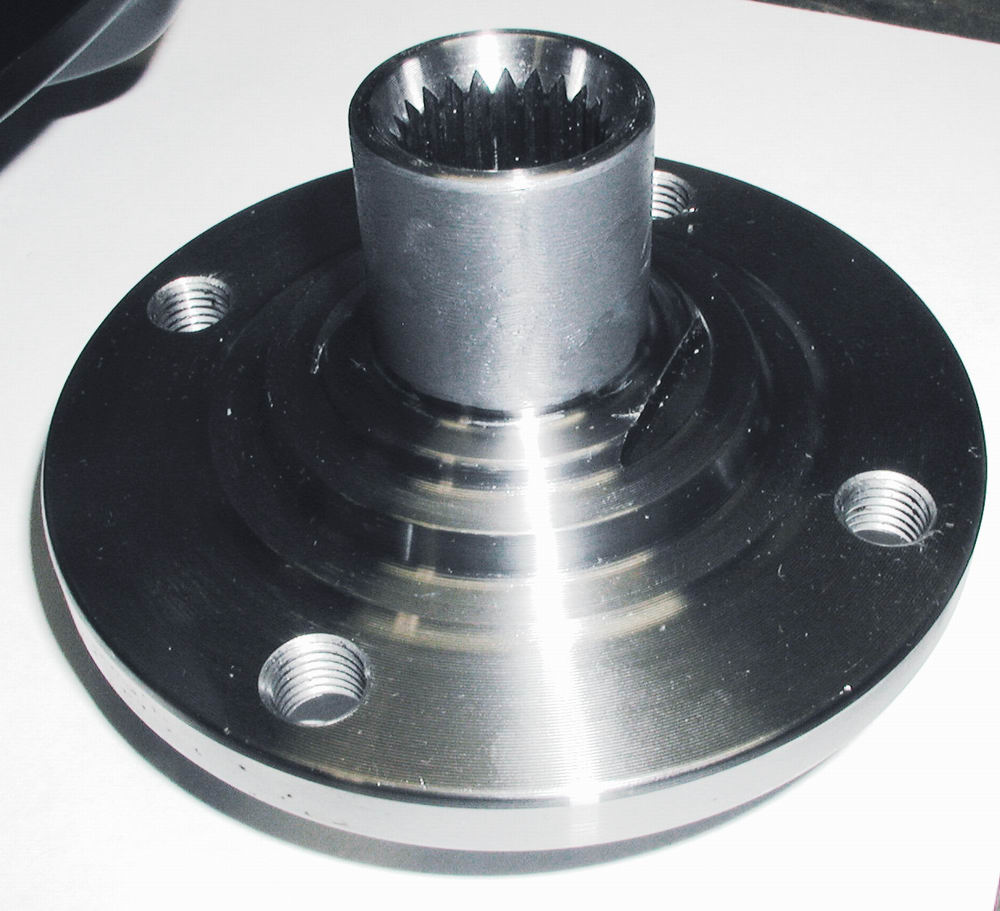
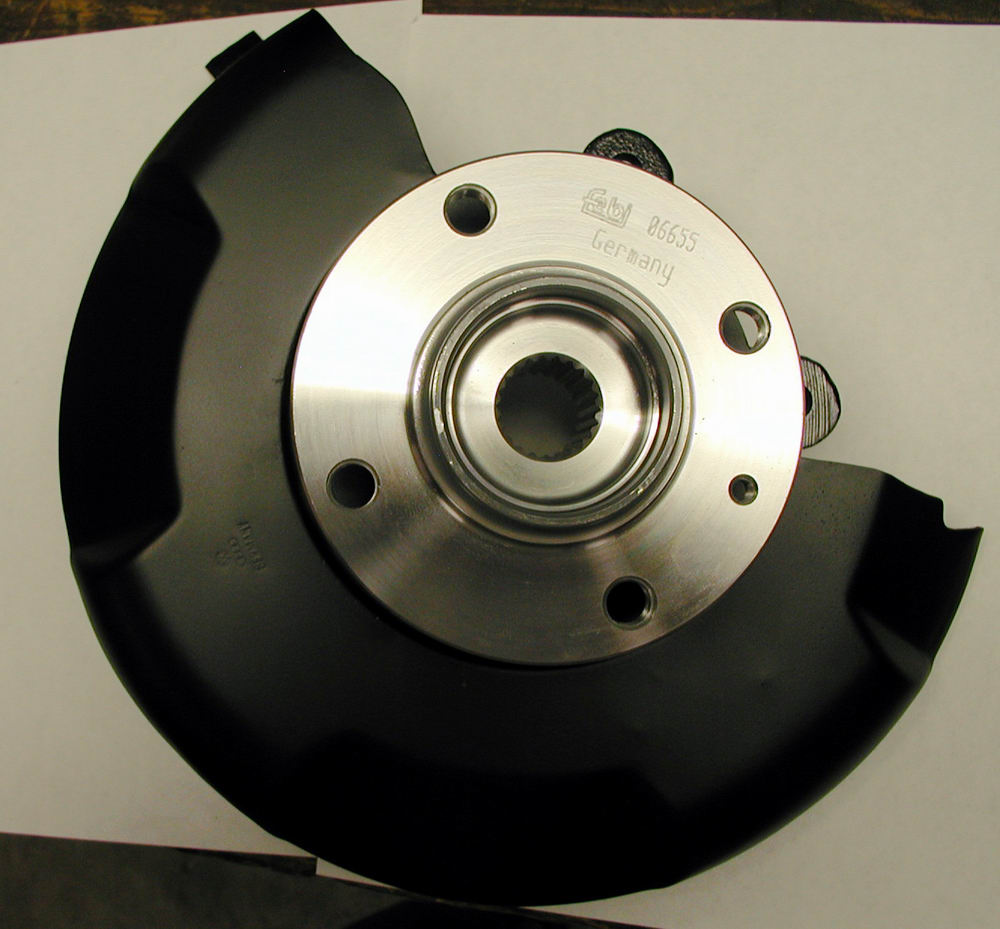
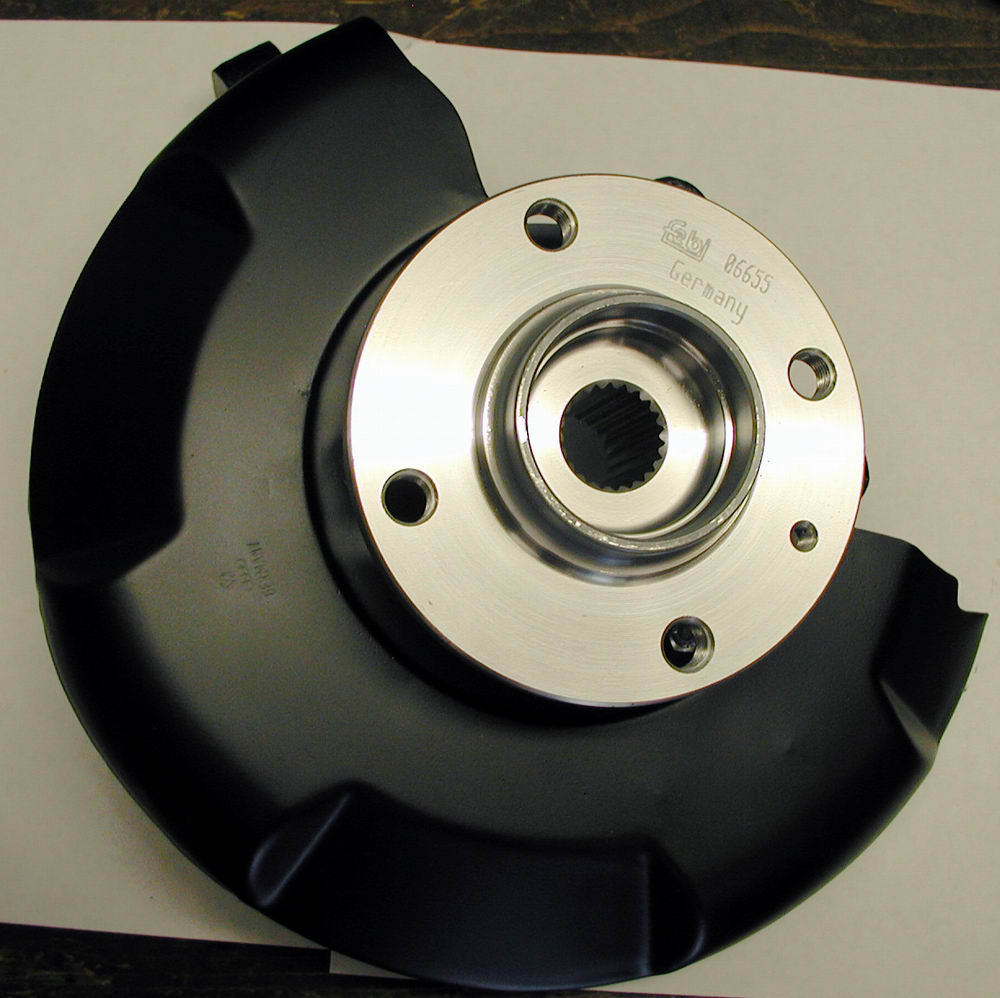
 nice smooth edges...and no internal burrs either! 

Finally we are ready to install the new wheel bearings.  Here are all the tools that were needed to do the job along with the parts for one side:

augustns021 (25K) augustns019 (26K)
augustns020 (34K)
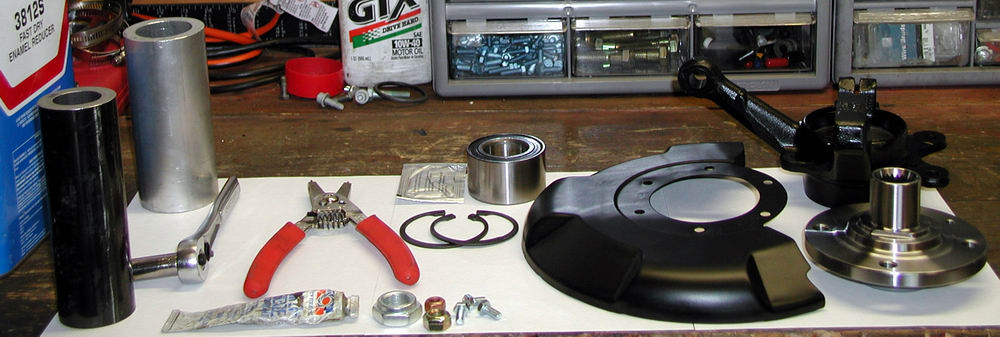
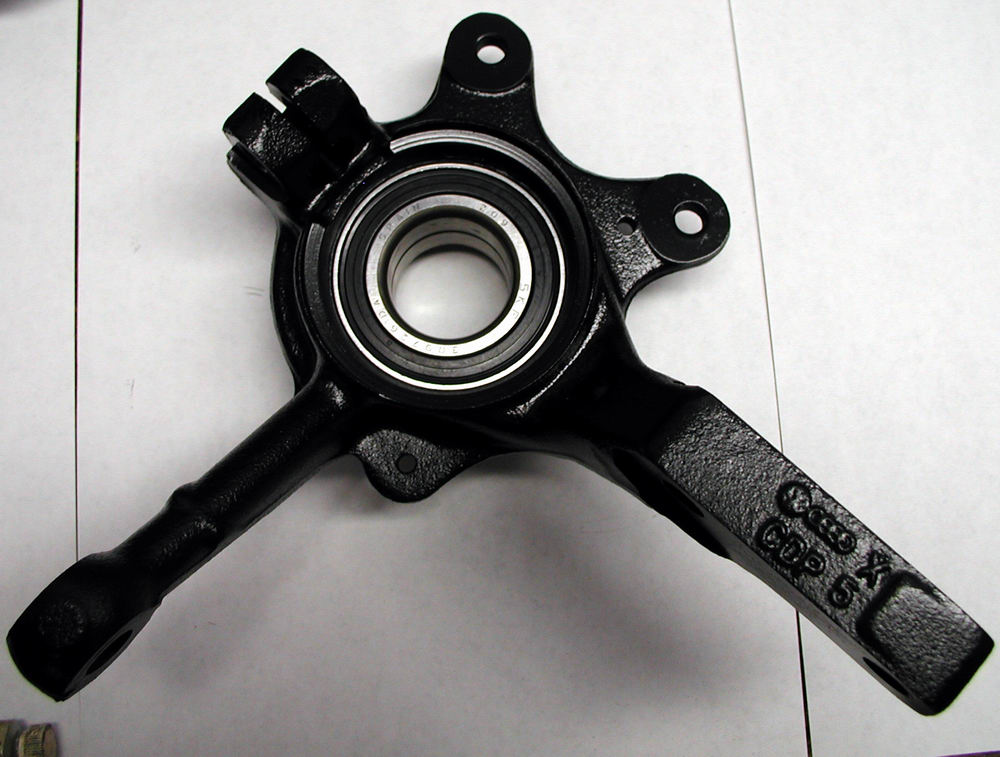
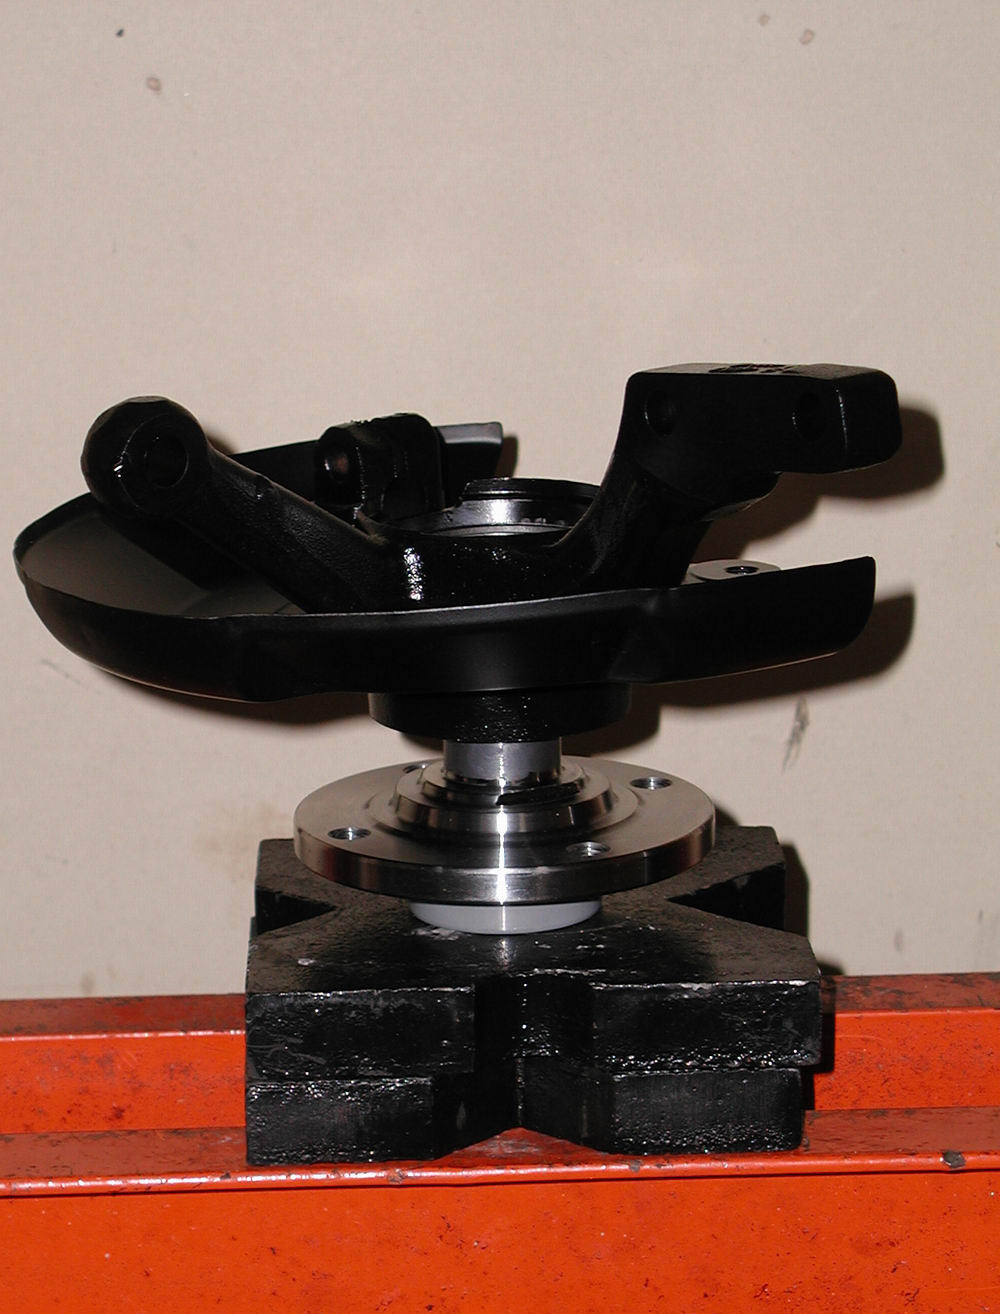
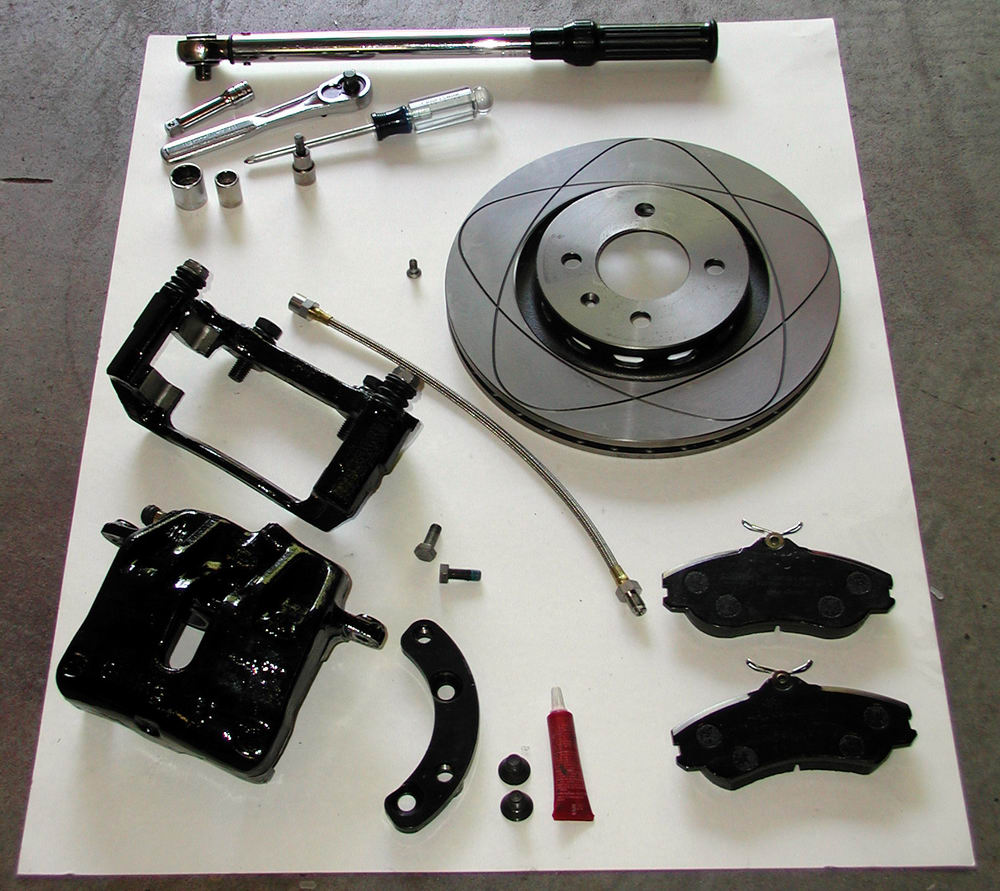
 Tubing for pressing in the bearings and other assorted tools and
 greases....

 Wheel bearing, snap rings, dust shield, hub, hub carrier, and
 assorted hardware....

First thing to do....grease up the inside of the hub carrier where the bearing seats and also the outside of the wheel bearing itself:

augustns022 (26K) augustns023 (26K)
augustns024 (20K)
 Not too much grease...not too little....

We then put one of the snap rings into the groove on the end of the hub carrier keeping in mind that the next step would be using the hydraulic press to force the wheel bearing into it's home.  This is relevant because one end of the hub carrier sits flat while the other end is kaddywumpus.  To make life easier...I put the first snap ring into the end that lays flat.....

augustns025 (29K) augustns026 (29K)

As a side note....if you don't have one already, a hydraulic press is a wonderful tool to keep in the garage. They are invaluable for many things car related...such as pressing in bearings or mounts, tranny work (internals), and also fabricating bits and pieces for fastening, spacing etc.(using a set of brake dies with press).

Back to the task at hand.....now we had to create a level surface so that the wheel bearing got pressed in evenly.  This was to avoid a stuck wheel bearing, jammed in half way on one side and barely at all on the other. 

Initially, it didn't matter what we used between the hydraulic press and level hunk o' metal/bearing.  I was feeling sort of lazy though, so I found a suitable piece of metal to shove between the cylinder on the press and the piece of metal on top of the bearing......alternatively of course...I could have just pumped the press cylinder down to the piece of metal......

augustns017 (32K)

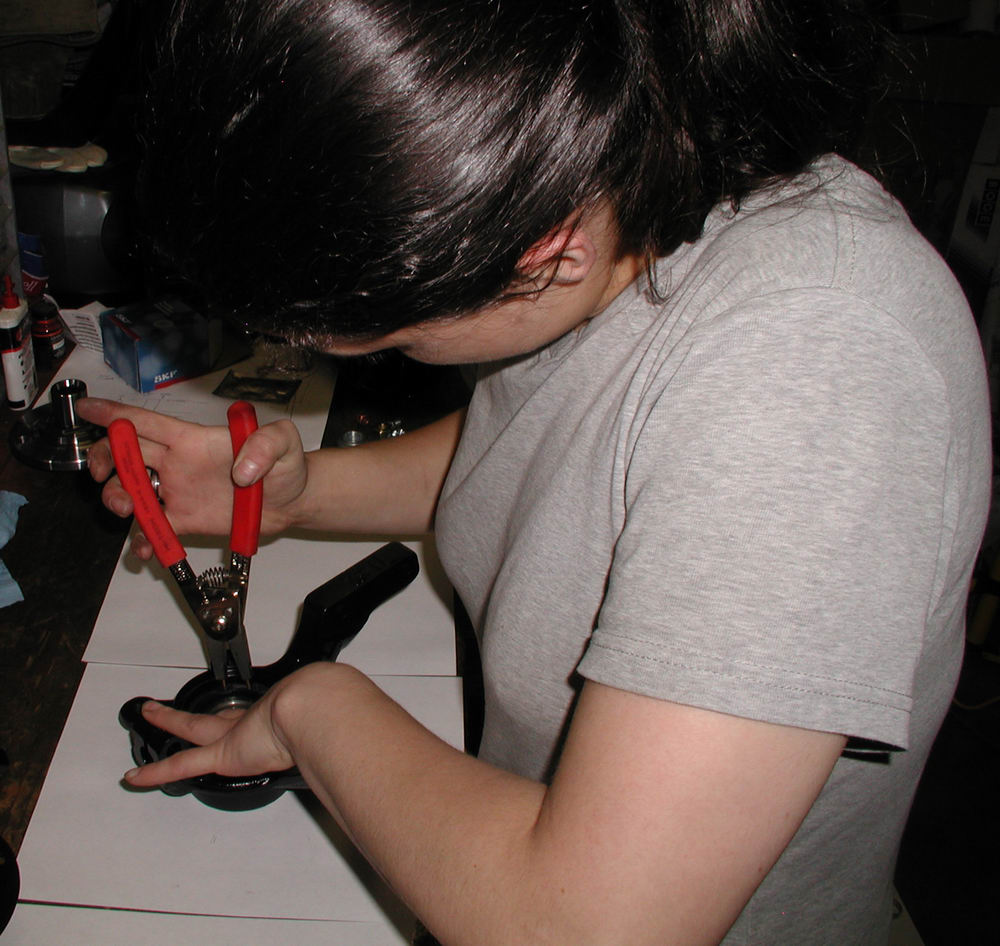
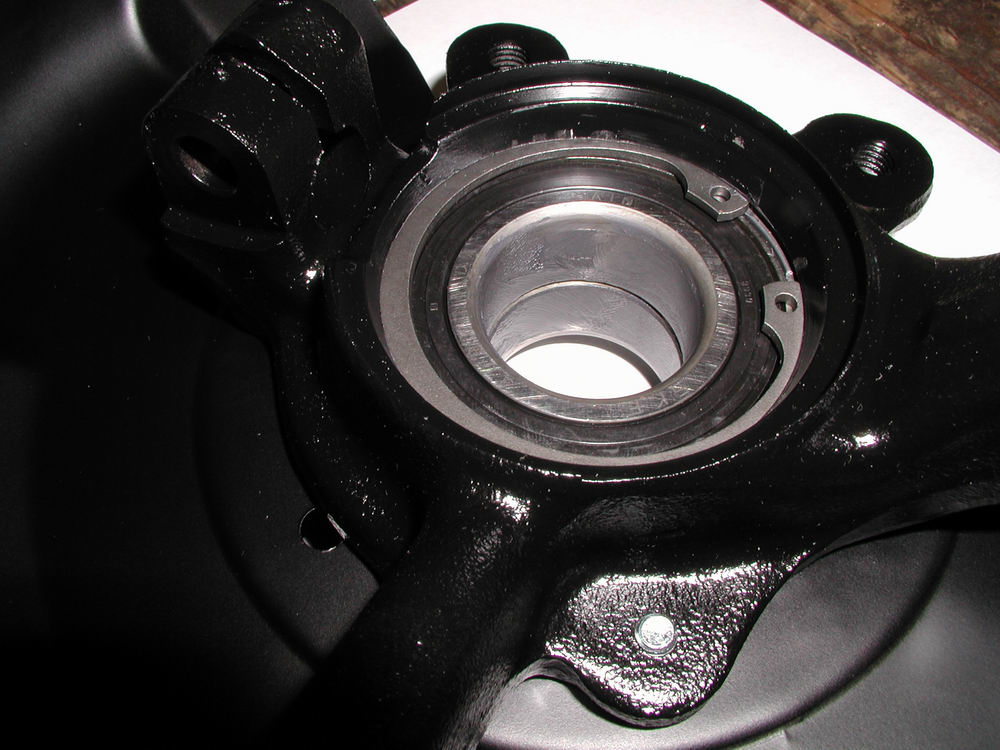
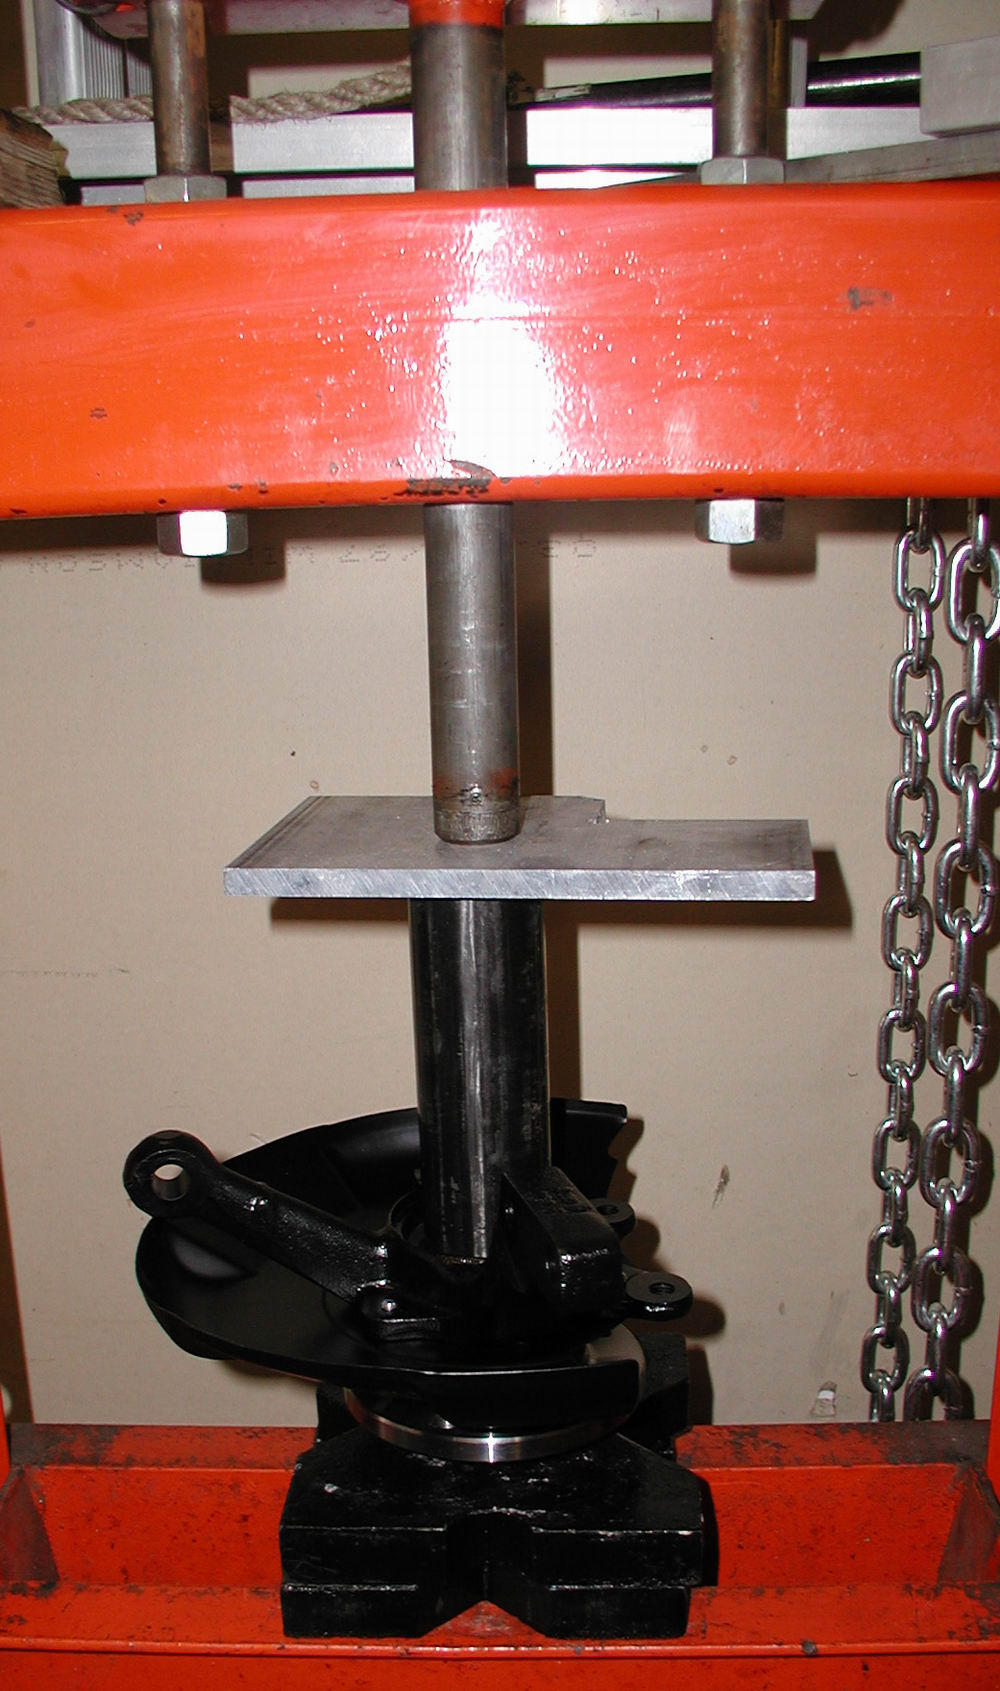
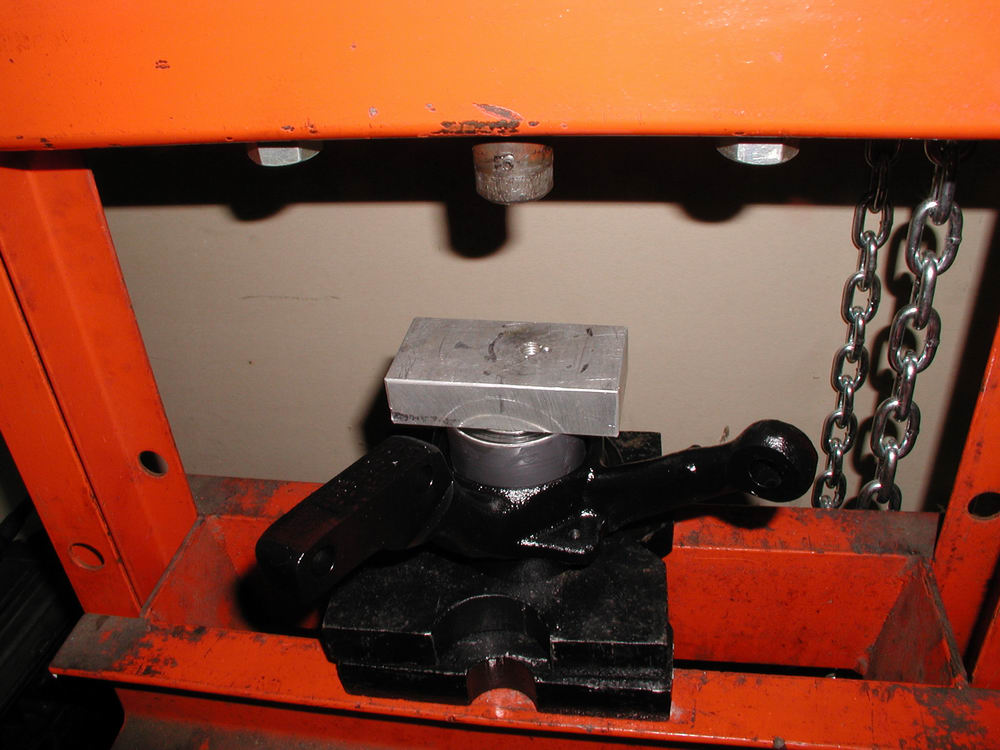
 With the bearing already partially in, you can see that having the
 level hunk o' aluminum really helps press it in evenly...
augustns027 (55K)

Pressing in the bearing required a bit more precision once the lip of the hub carrier was hit.  The 6061 tubing had an OD which matched the ID of the hub carrier....so, on to the top of the bearing it went with another piece of metal placed on top of the tubing for the press cylinder to push down on.

augustns028 (44K) augustns030 (55K)

...and finally...the wheel bearing has been successfully pressed in..sitting snugly against the snap ring.

augustns031 (29K)
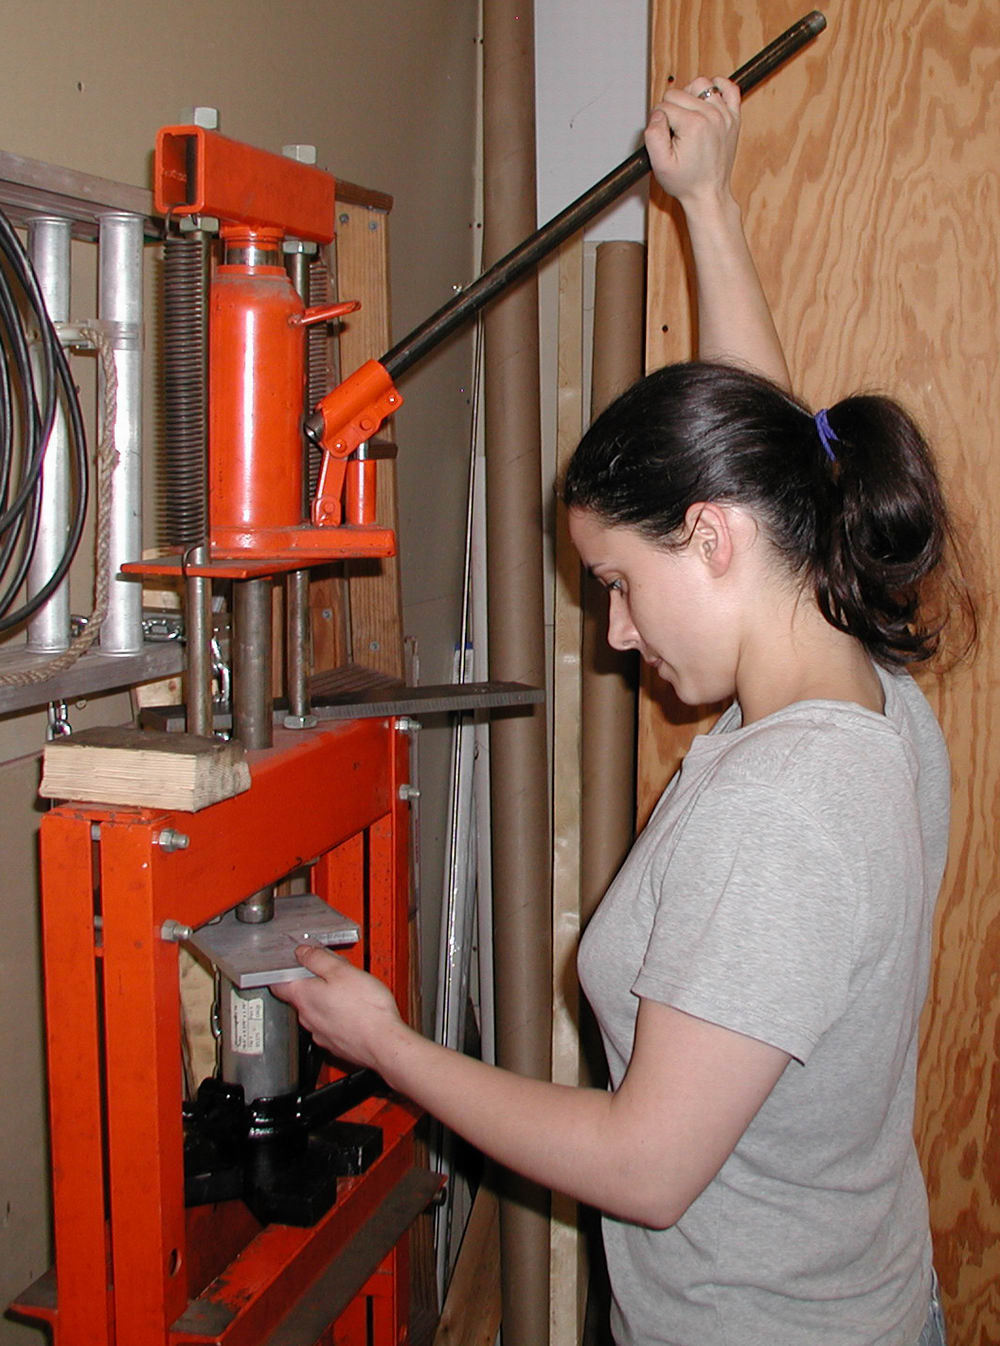
 ....and you were going to take the hub carriers to some shop 
 to press the bearings in because you didn't have a hydraulic
 press.  You see all the fun you would have missed out on? 
 ...and of course over time...just think of the money you could
 save for more car parts cash in your pocket for....more....
 ....CAR PARTS!! 

Now it was time to put snap ring #2 in it's place.  This one wasn't as friendly as the first....and more than a few swear words left my lips during the process of getting the damn thing into the groove....

But....in the end....I won...and that is all that matters....

augustns032 (31K) augustns033 (35K)

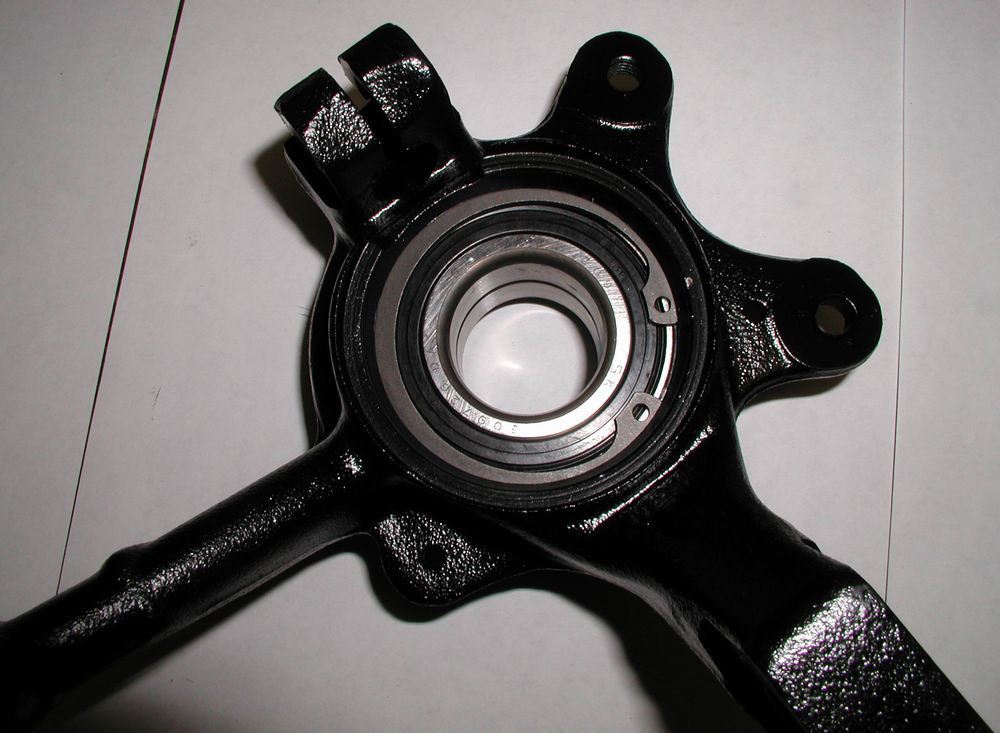
 ....stupid snap ring....grrr.....
augustns034 (30K)

After the wheel bearing had been pressed in and the snap rings put in place, I attached the dust shield to the hub carrier.

augustns035 (26K) augustns036 (33K)
augustns037 (35K)


 ...while trying not to mess up the nicely painted surface in the process...


Now it was finally time to play with the pornographic new hubs!!! 

Before pressing the hub into the wheel bearing, I put some grease on the inside of the bearing and outside of the hub:

augustns038 (30K) augustns039 (30K)

After putting the hub down with the hub carrier on top, it was time for the second piece of tubing. This time the ID was greater than that of the wheel bearing and the OD did not exceed the wheel bearing's OD. 

augustns040 (34K) augustns041 (56K)

.....and finally....the new wheel bearing and hub were pressed into the hub carrier.....

augustns042 (33K) augustns043 (29K)

...and now from the other side.....

augustns044 (27K) augustns045 (30K)

Finally, it was time to attach the hub carrier (et al) onto the axle and bolt the control arm and tie rod end down.  After slathering some anti-seize lubricant onto the axle nut threads, I screwed the nut on and torqued to spec.

augustns046 (57K) augustns048 (83K)

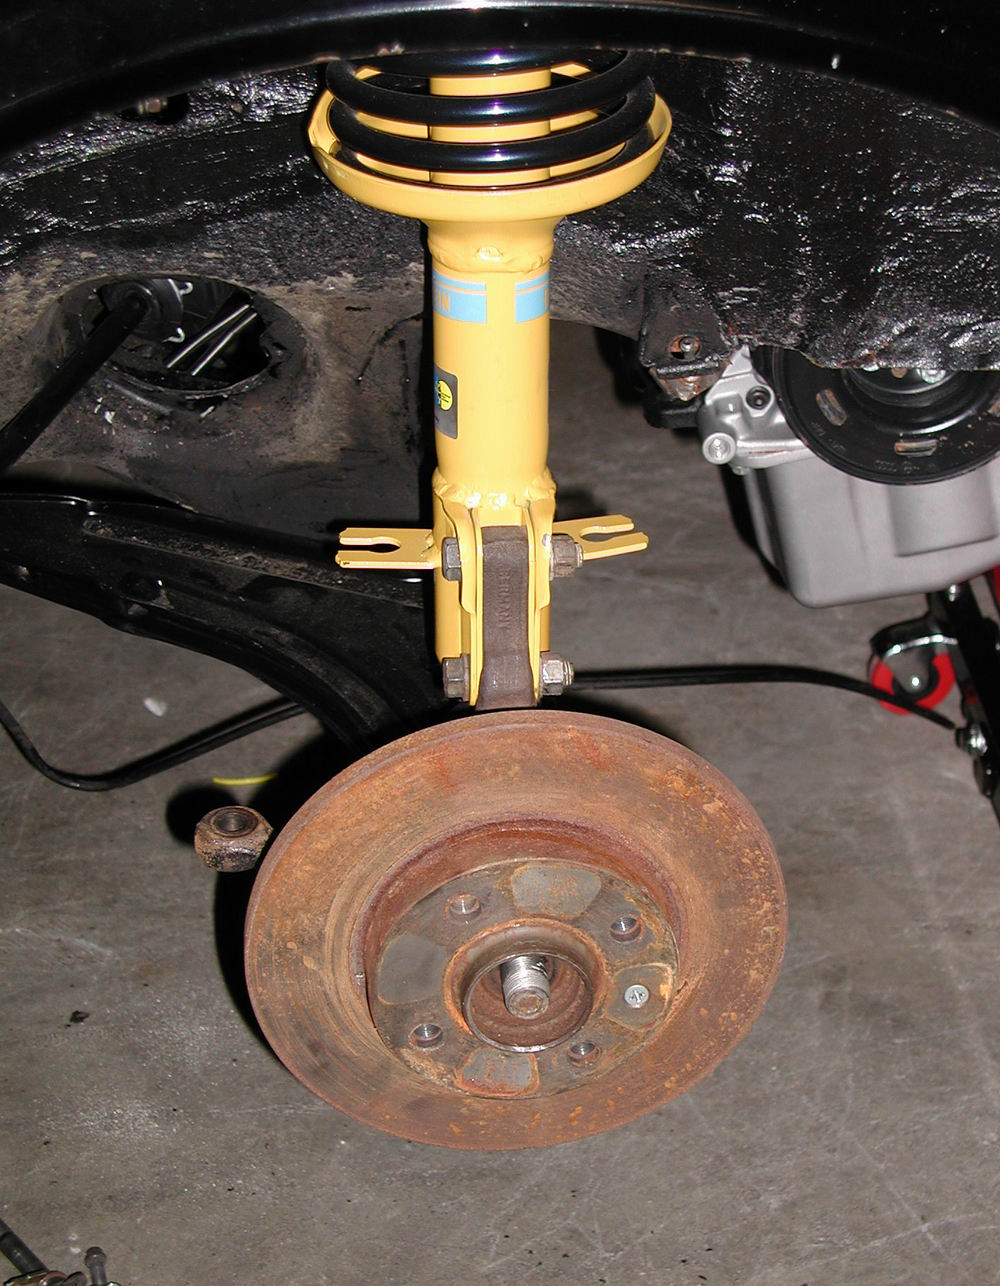
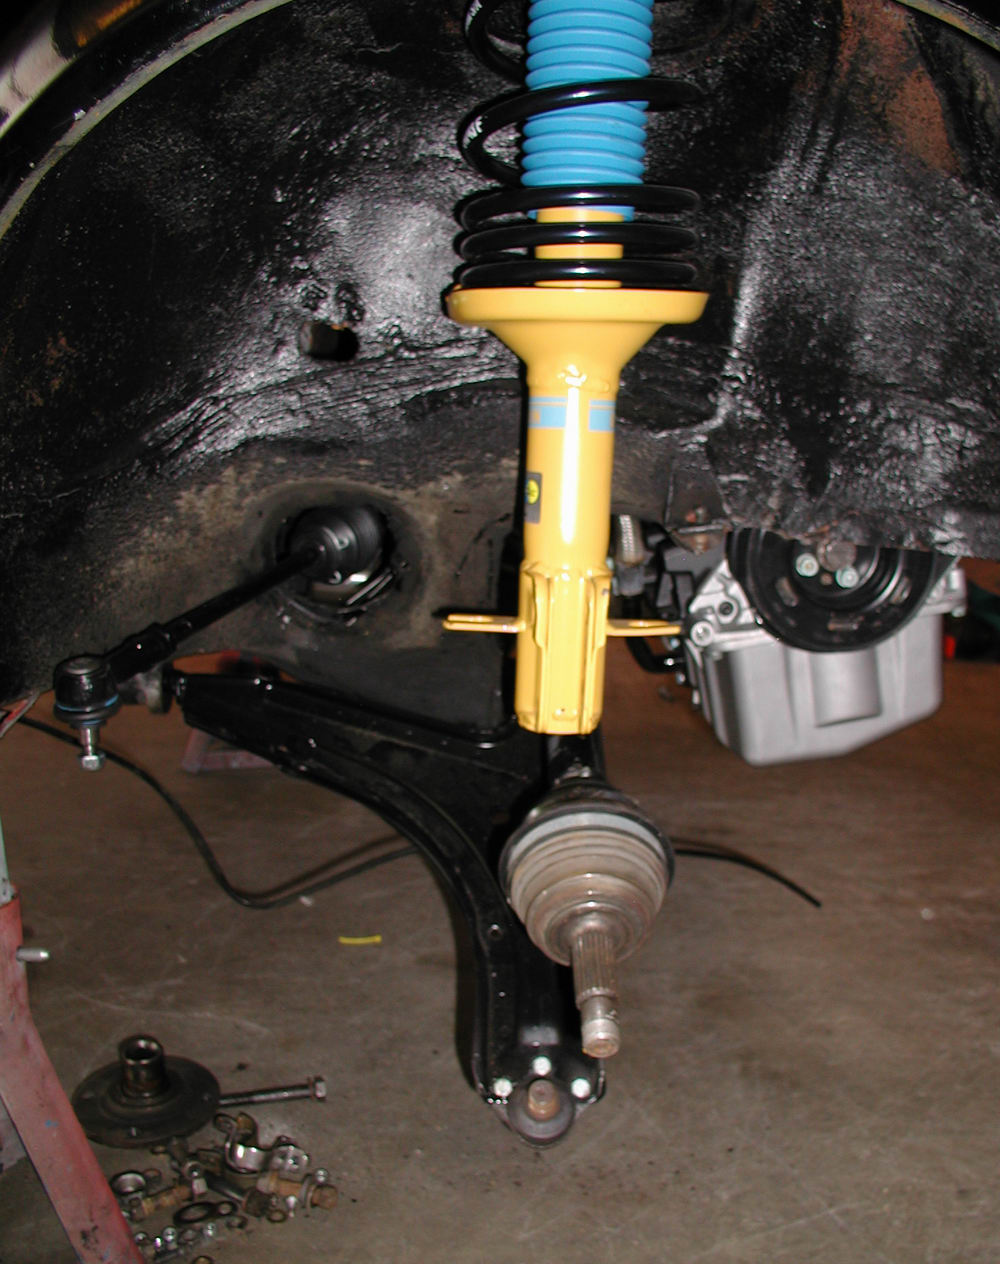
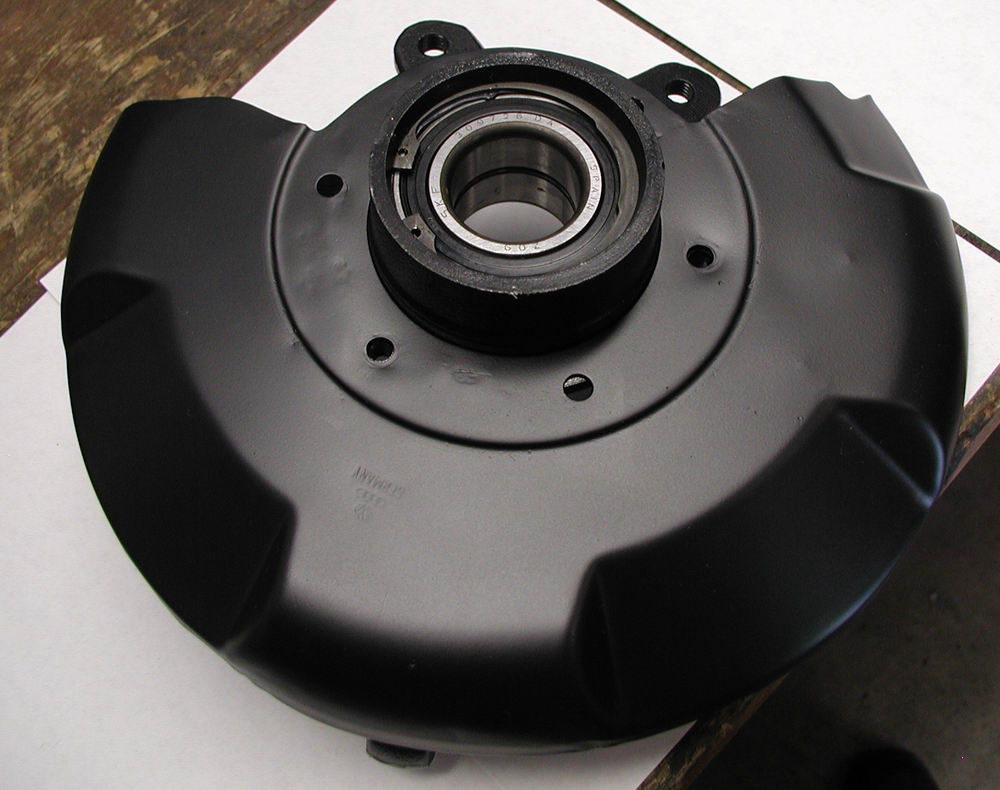
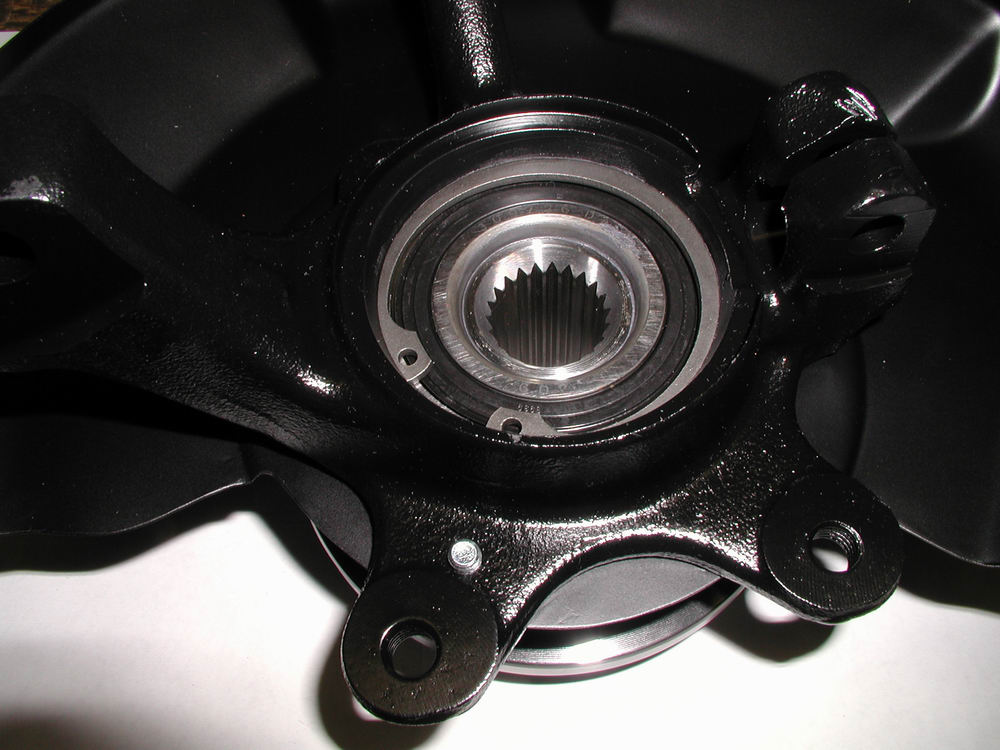
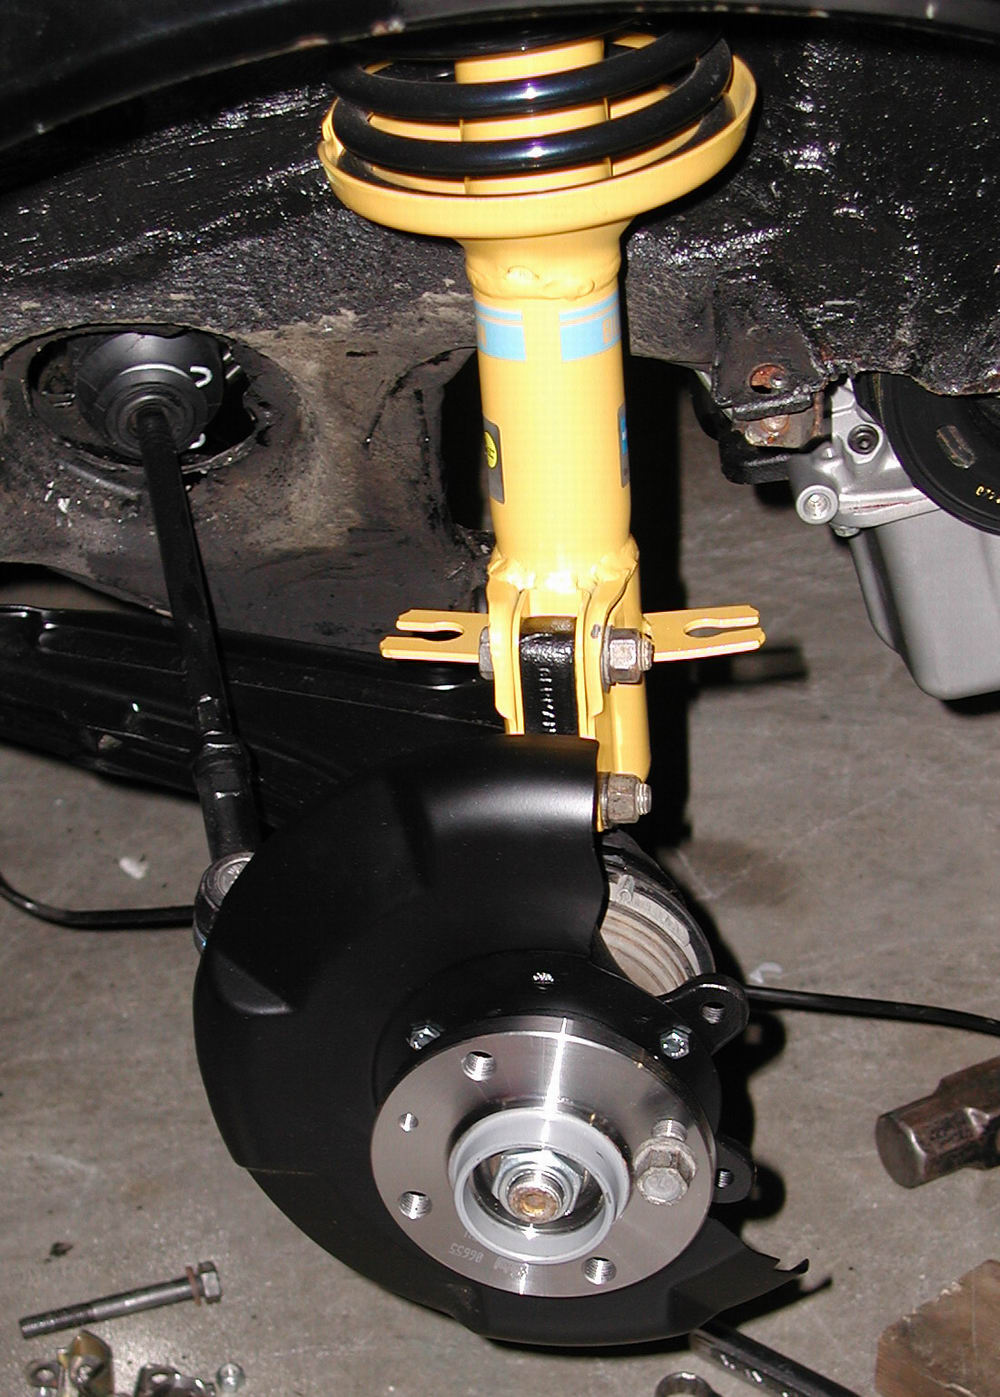
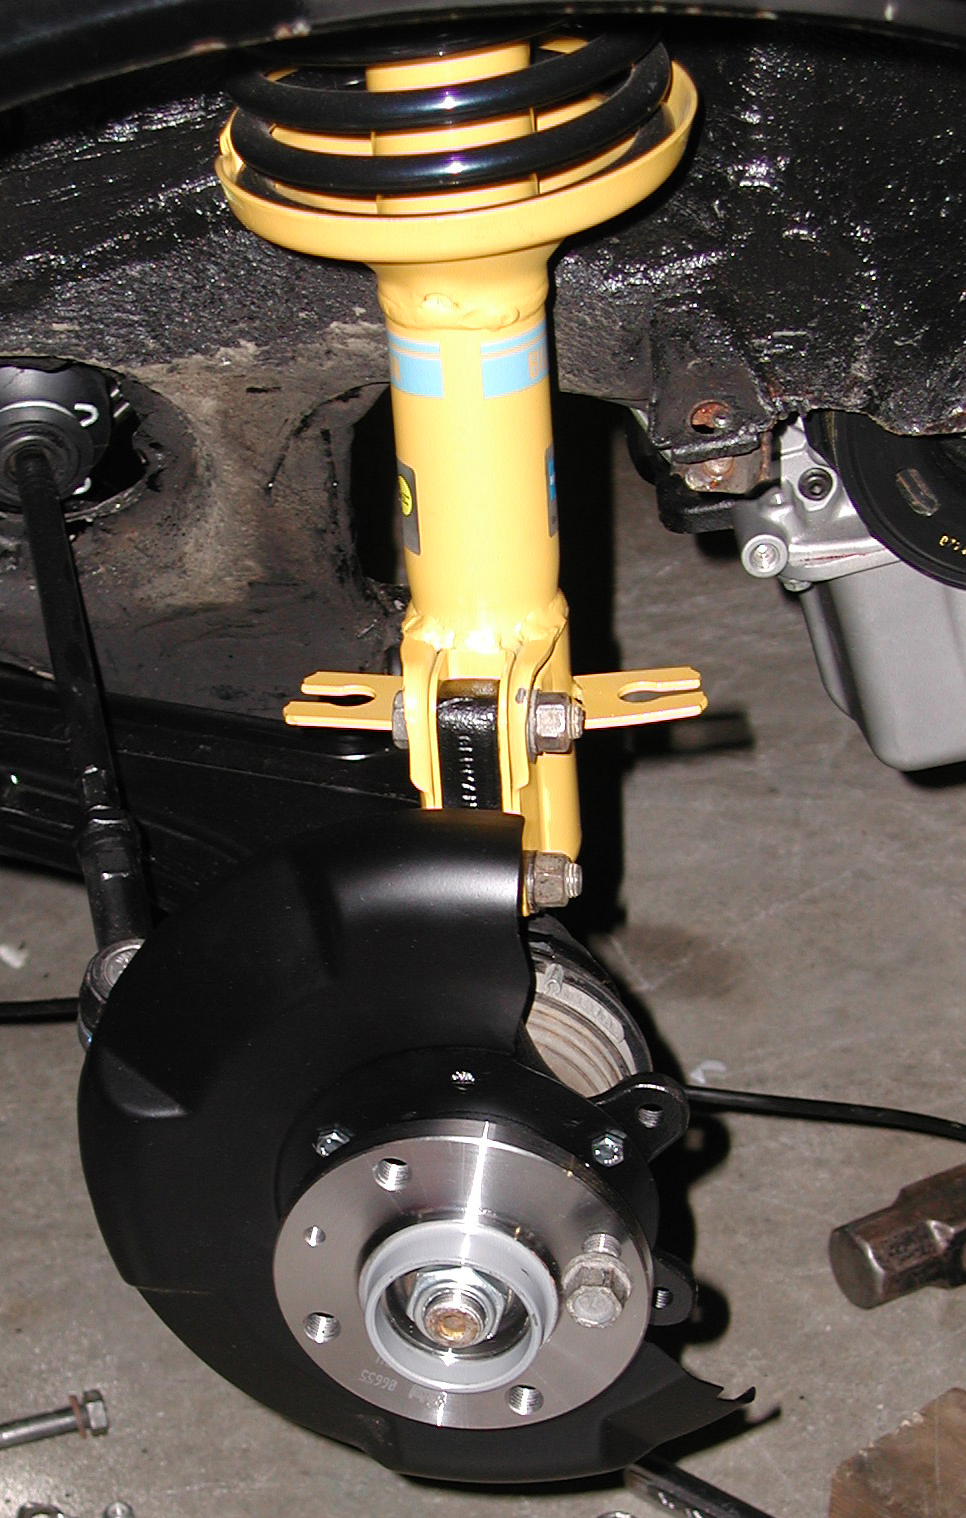
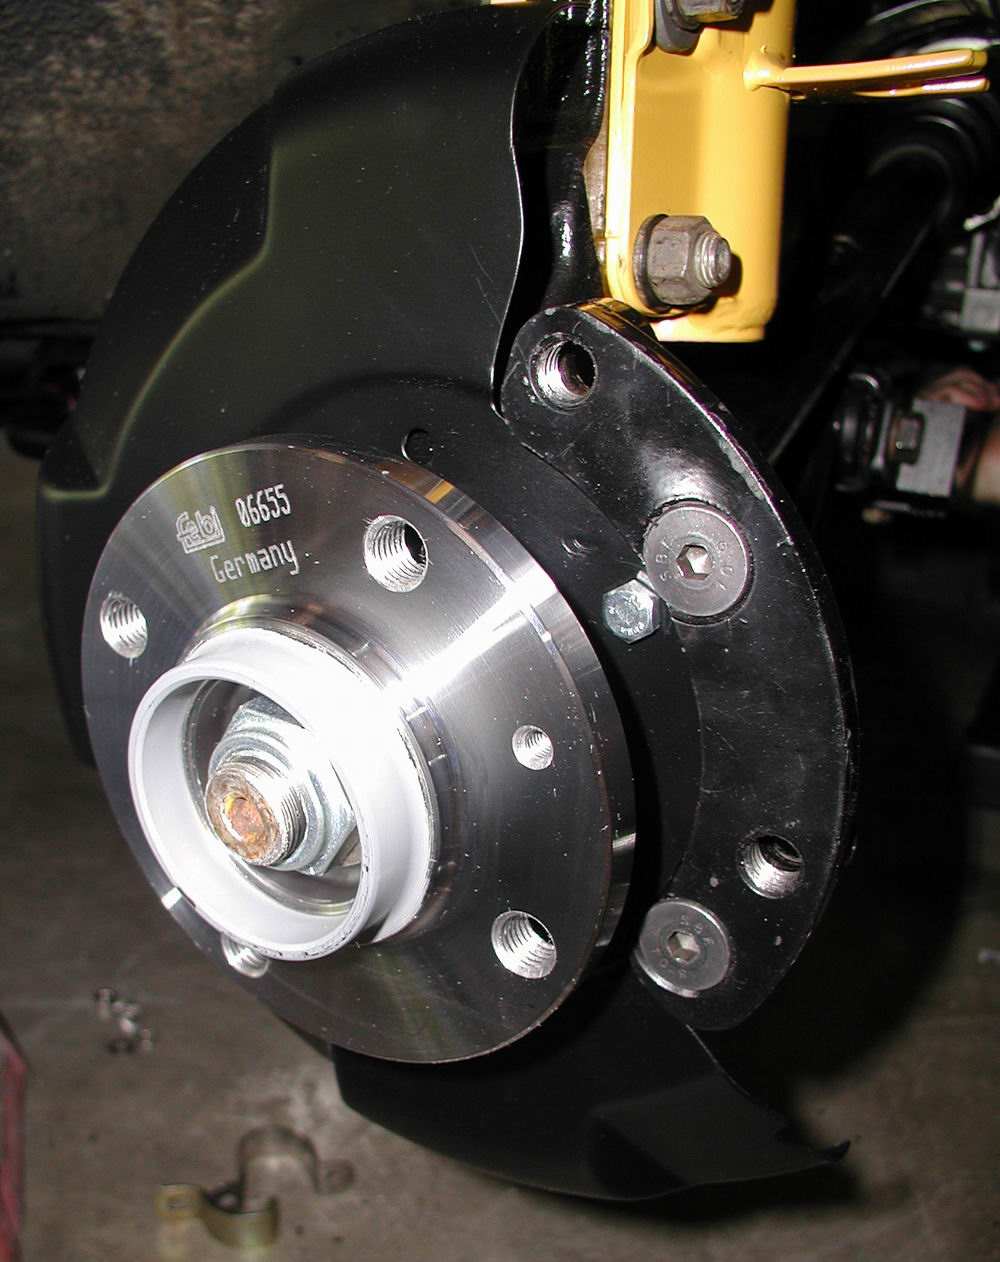
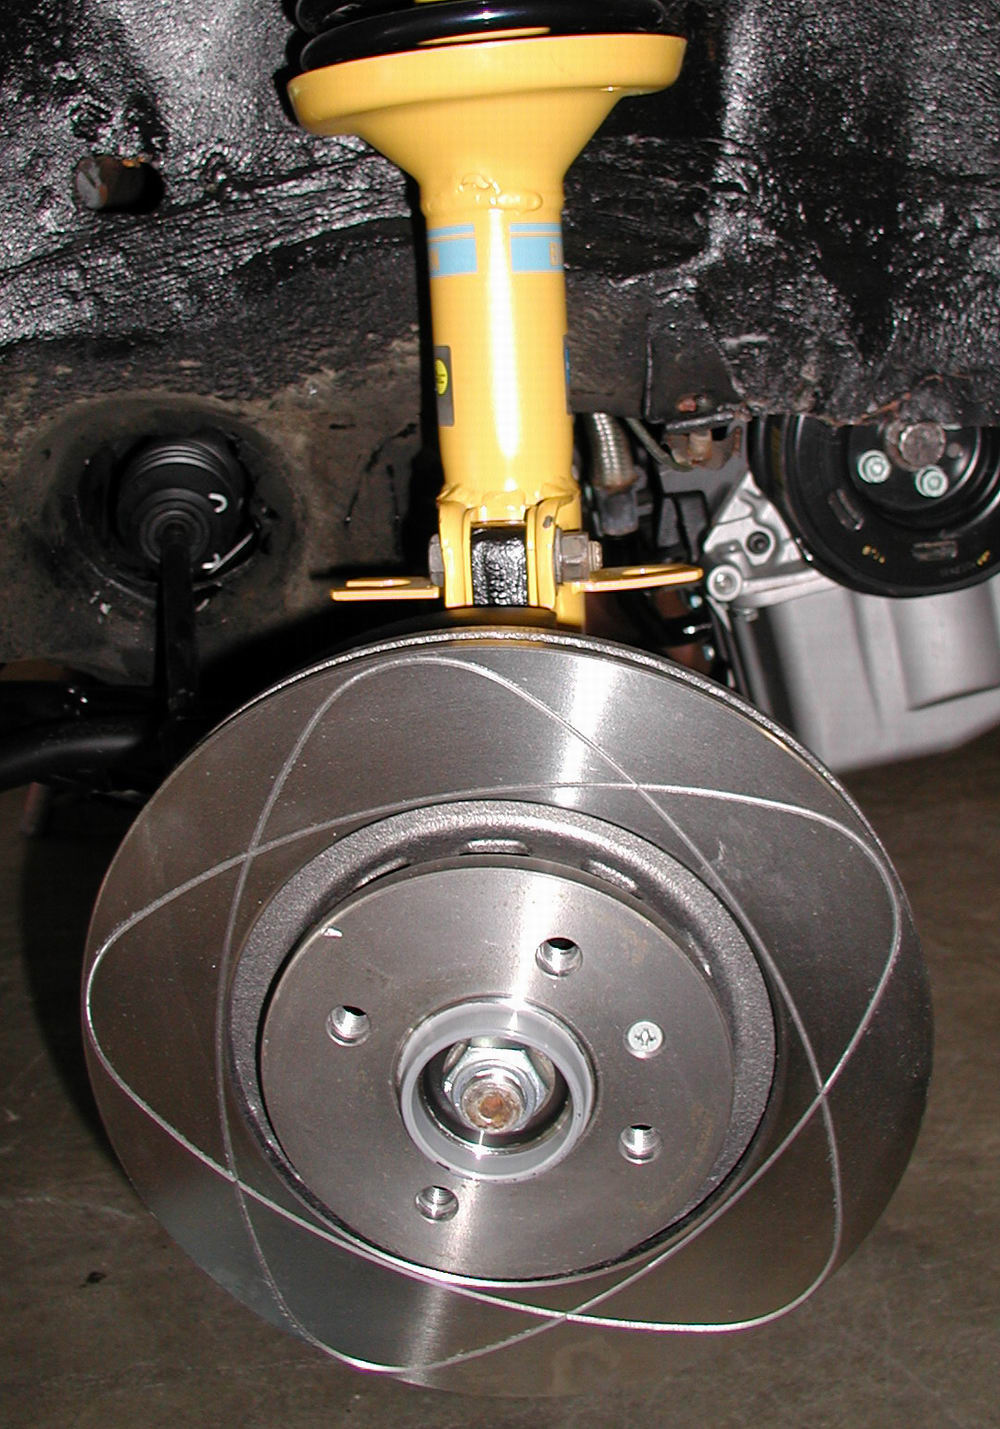
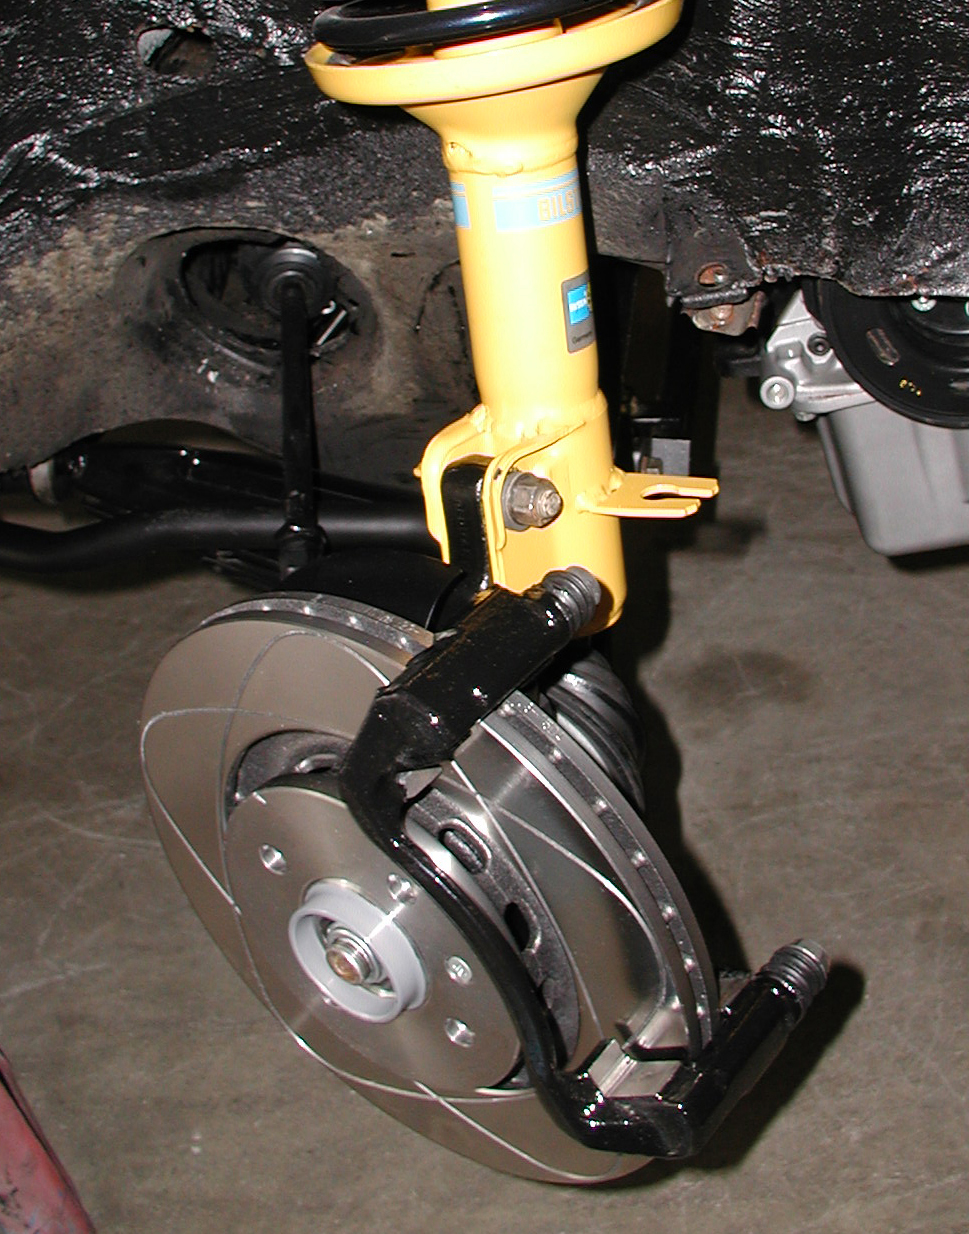
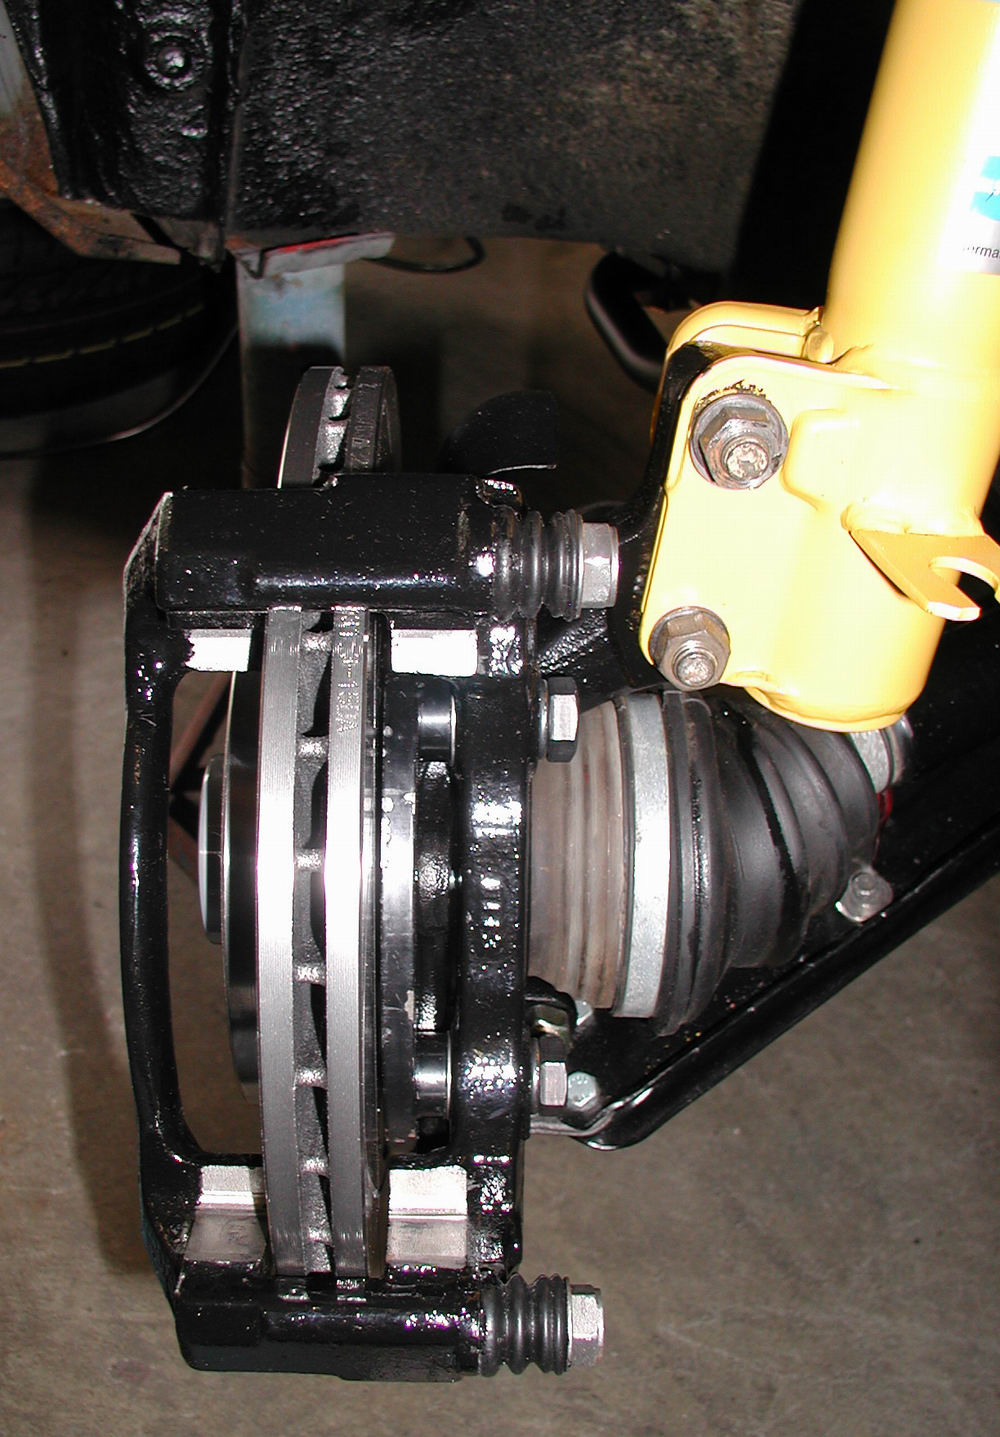
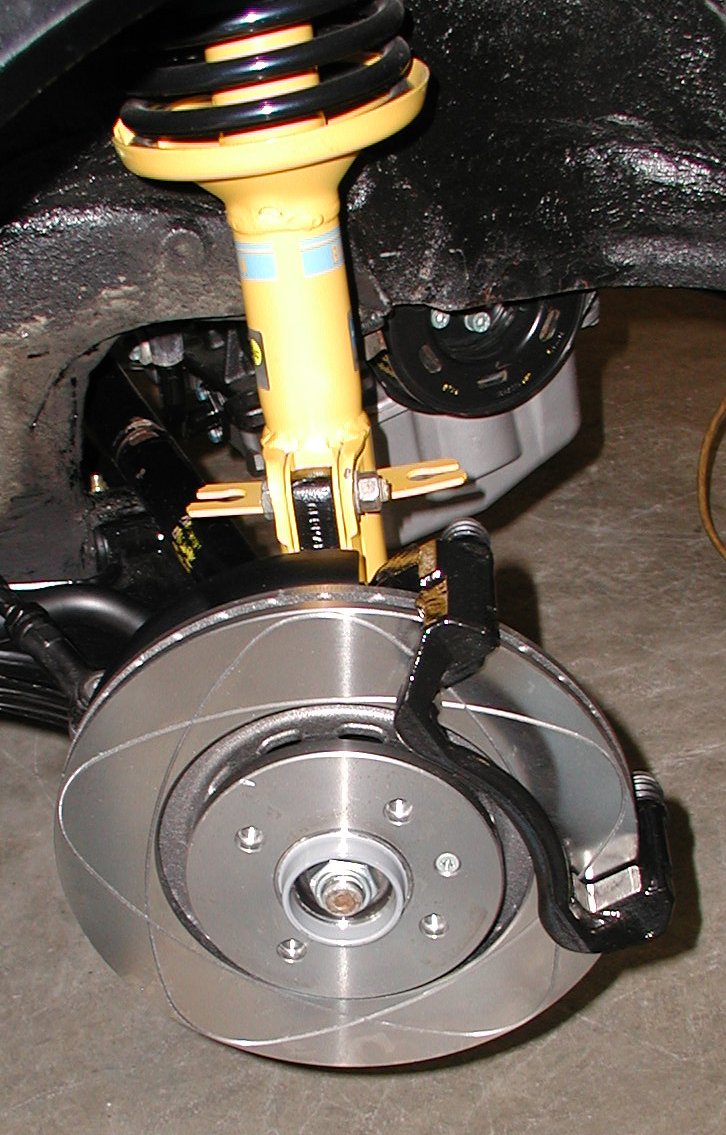
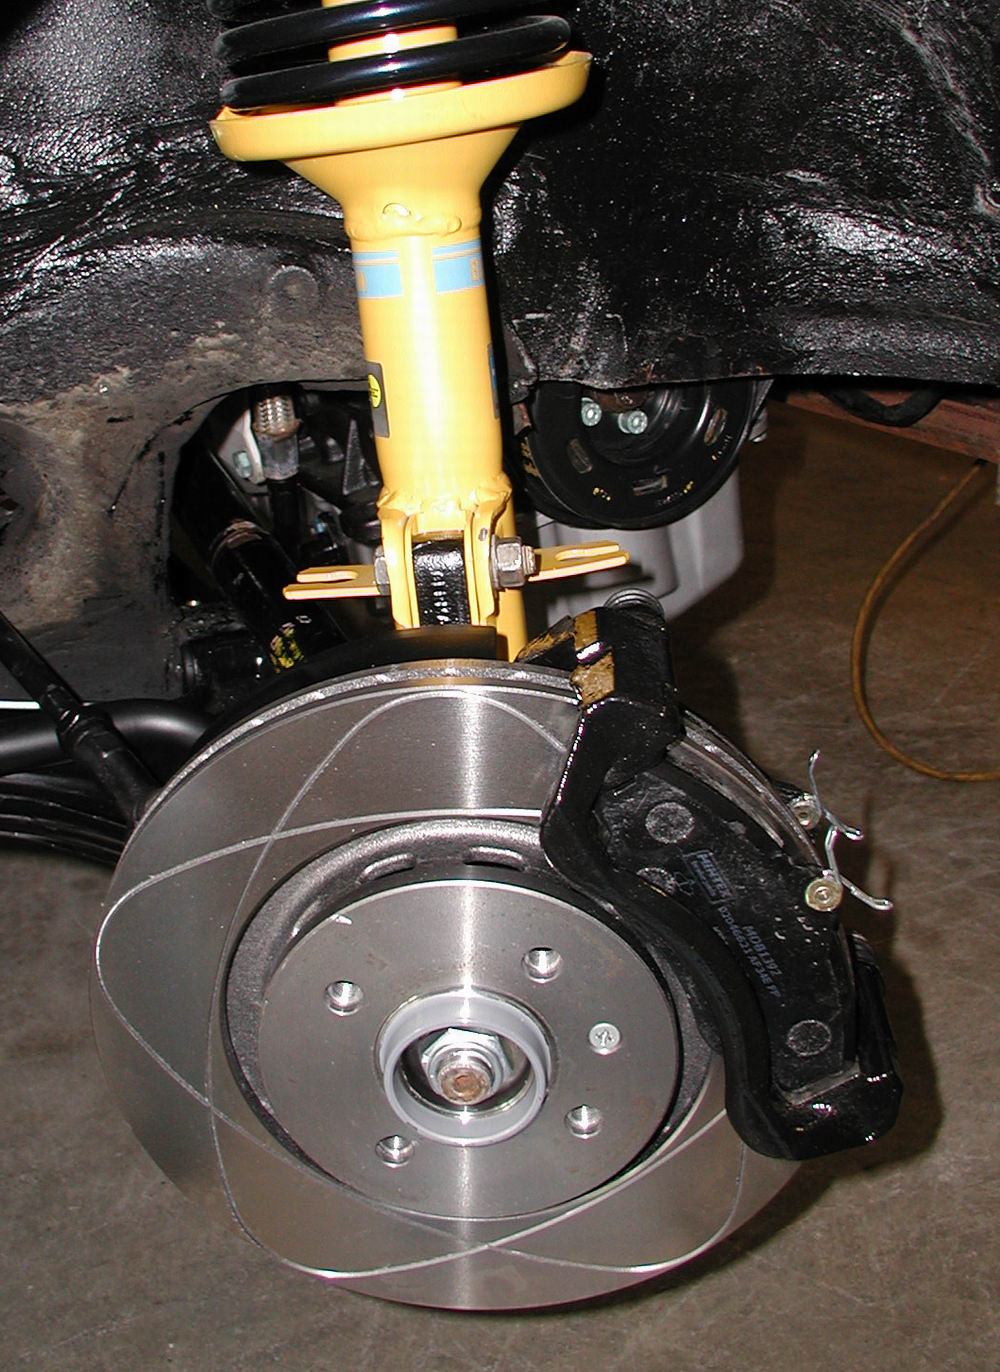
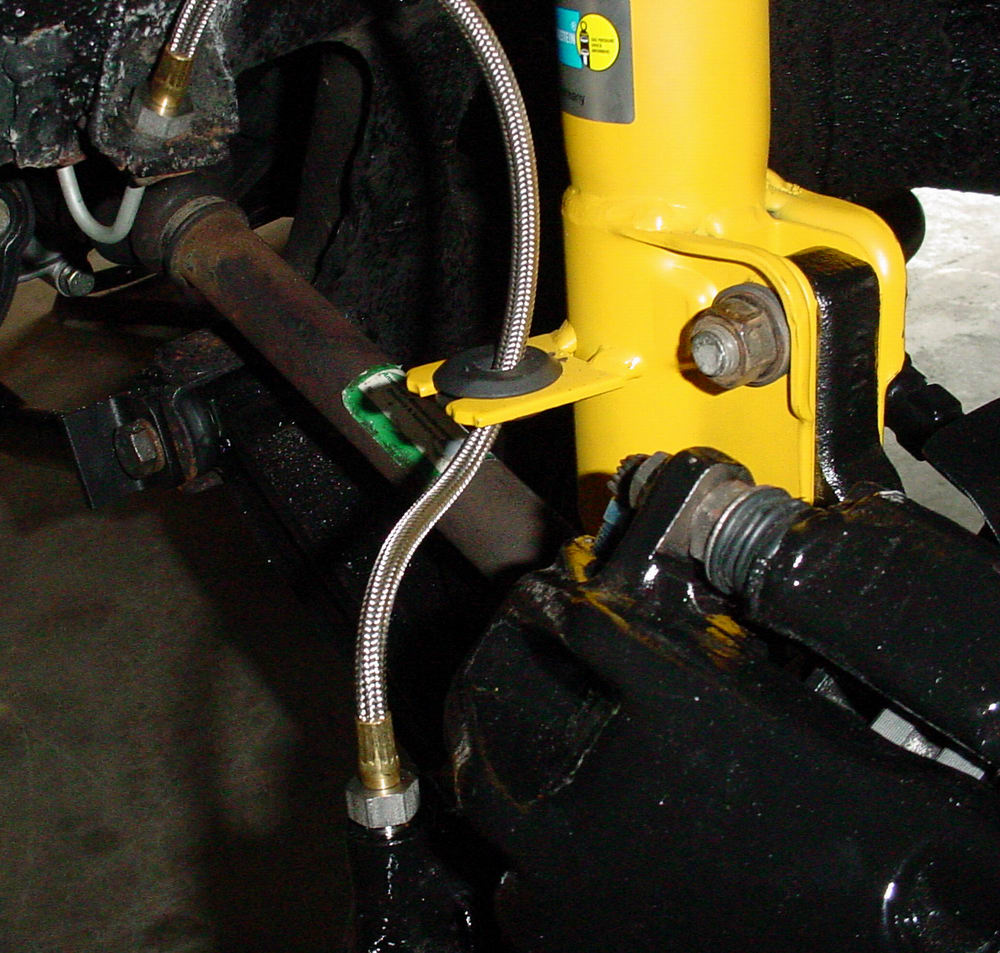
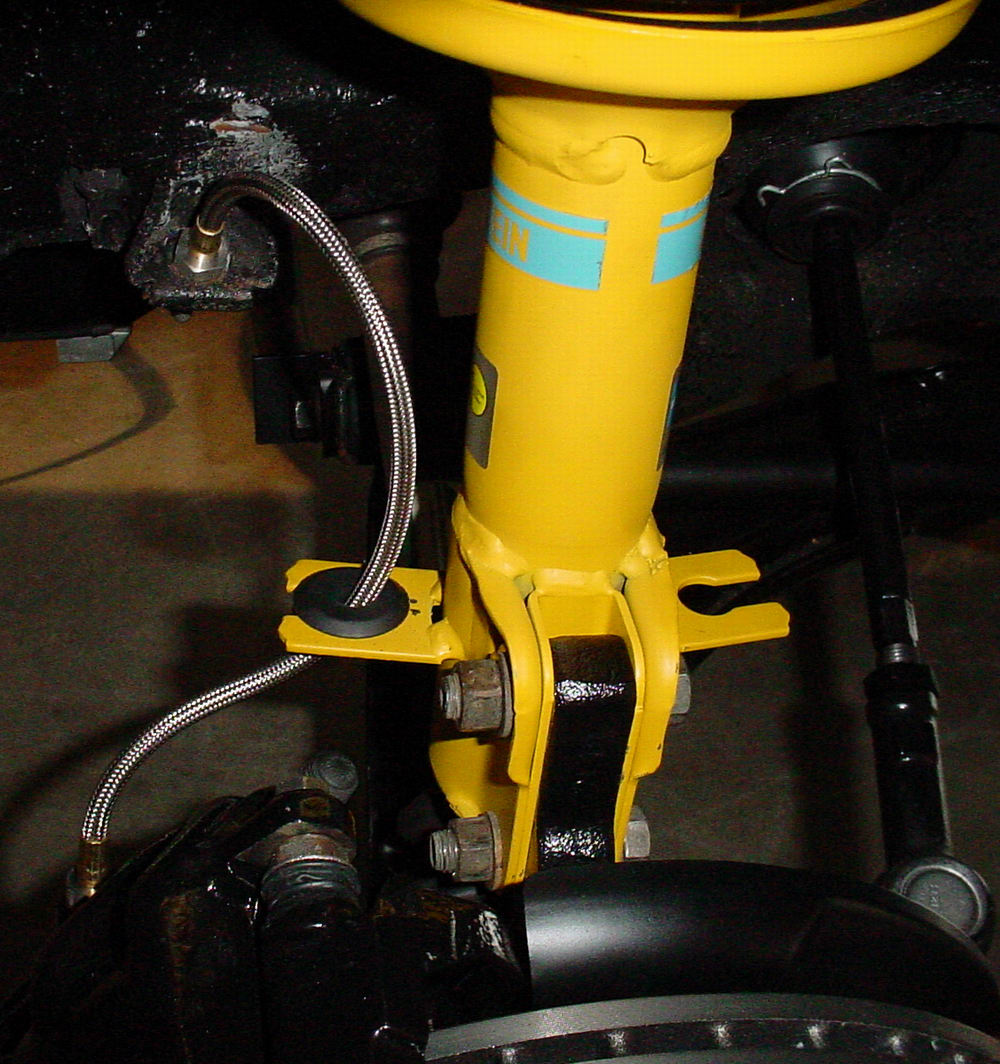
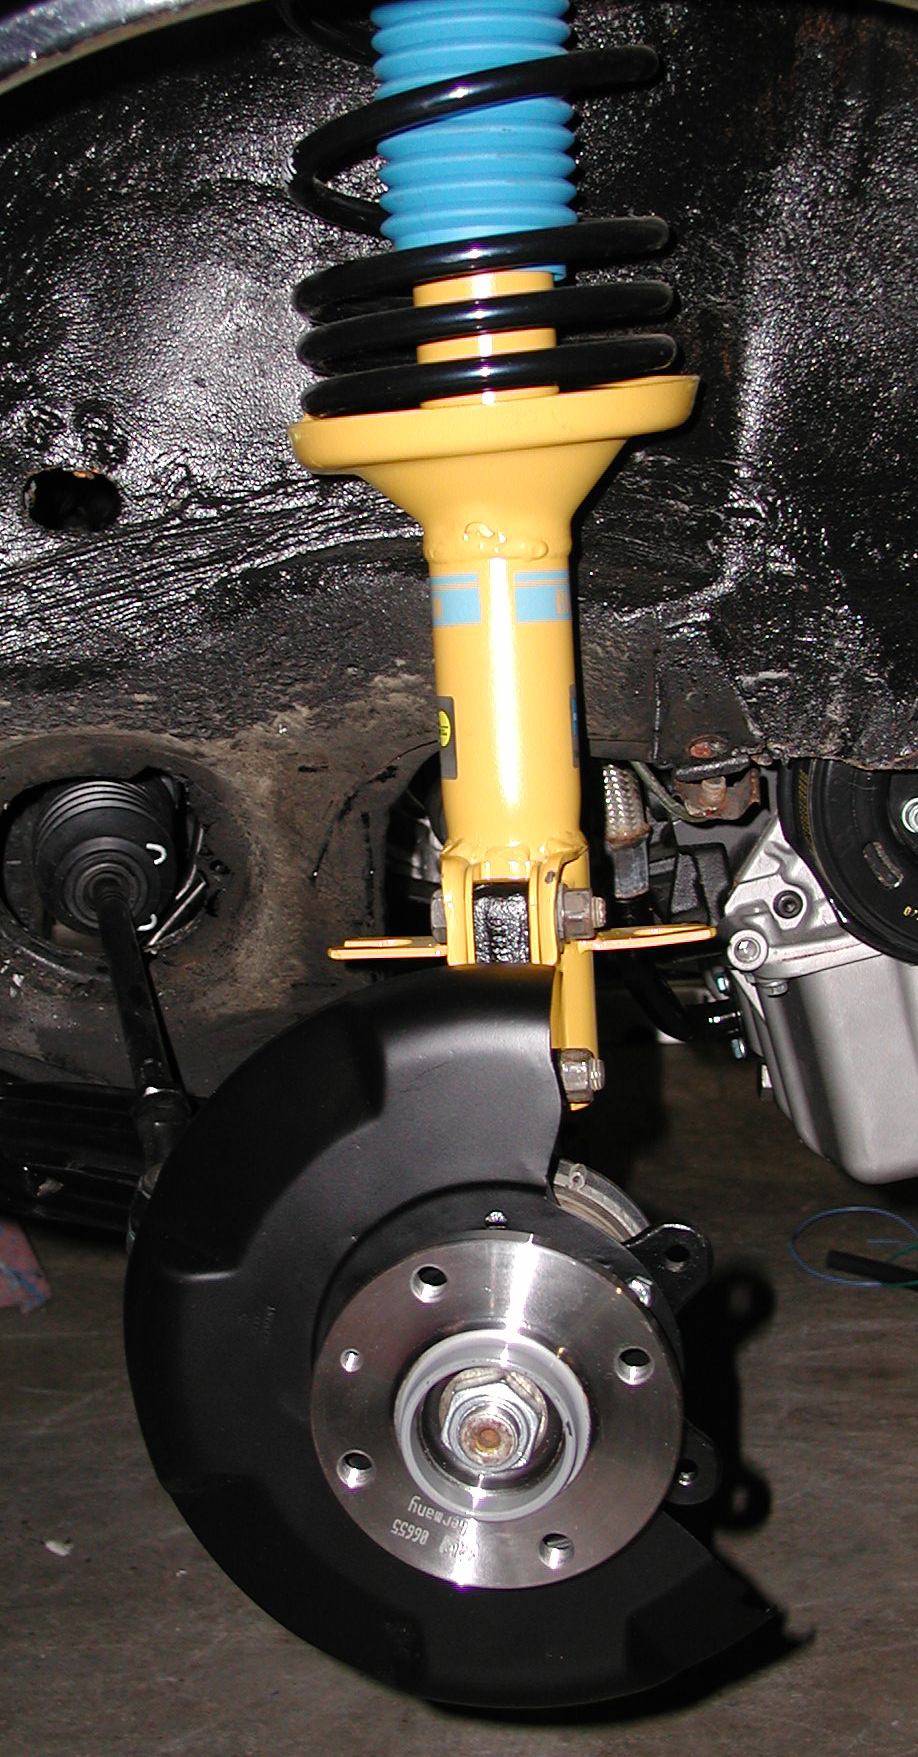
 It is a shame that those beautiful hubs are so covered up after
 install.....but....the whole thing still looks very pornographic...
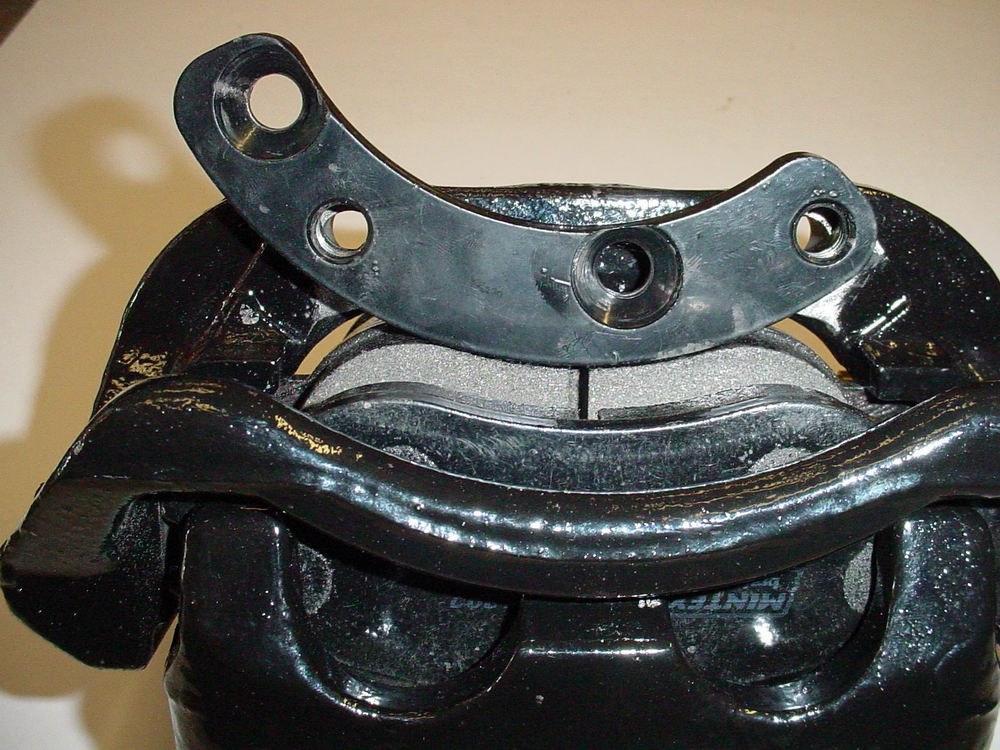
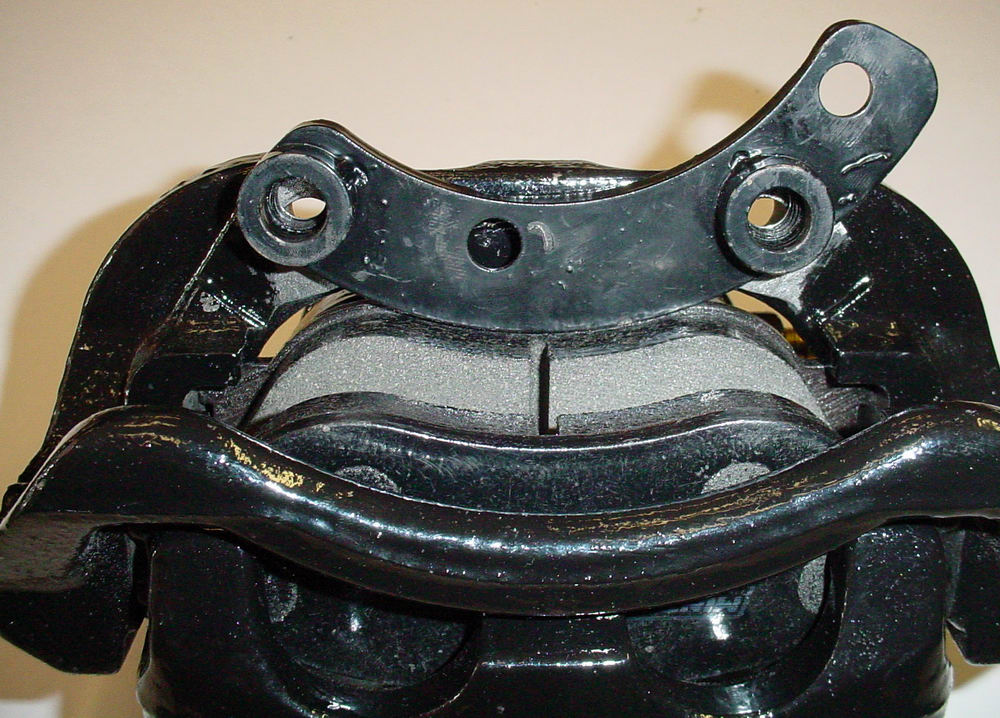
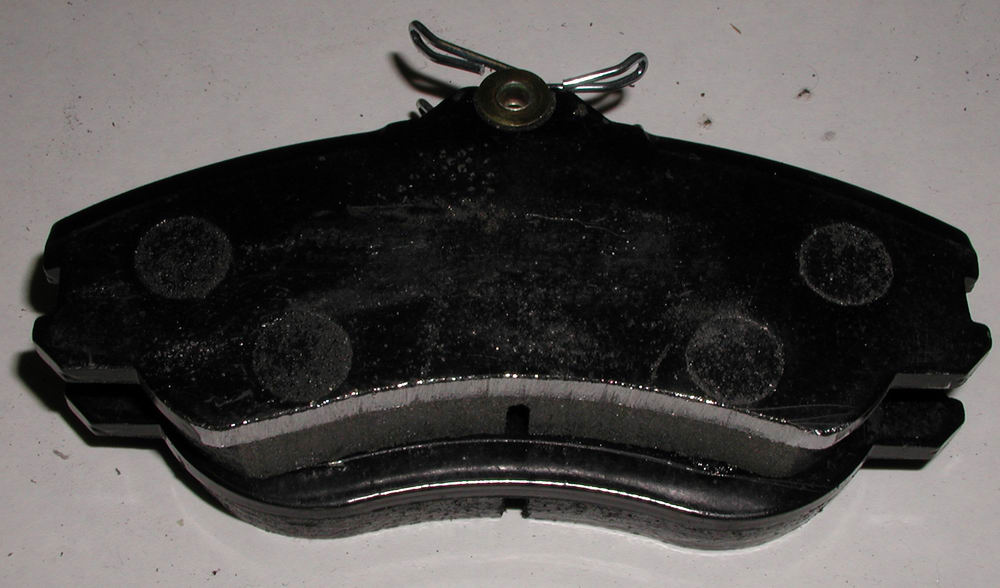
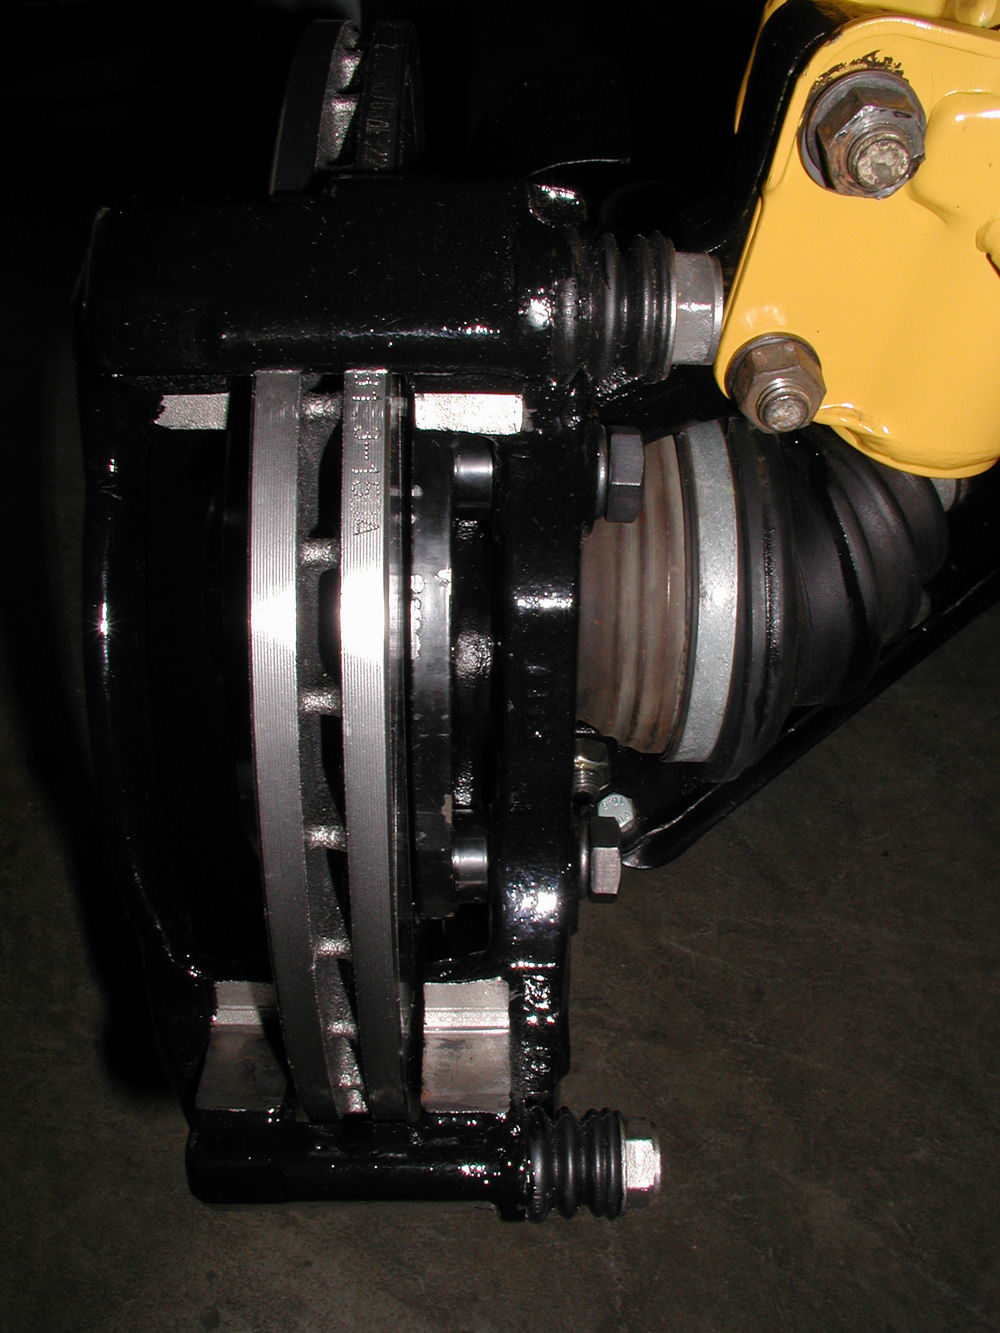
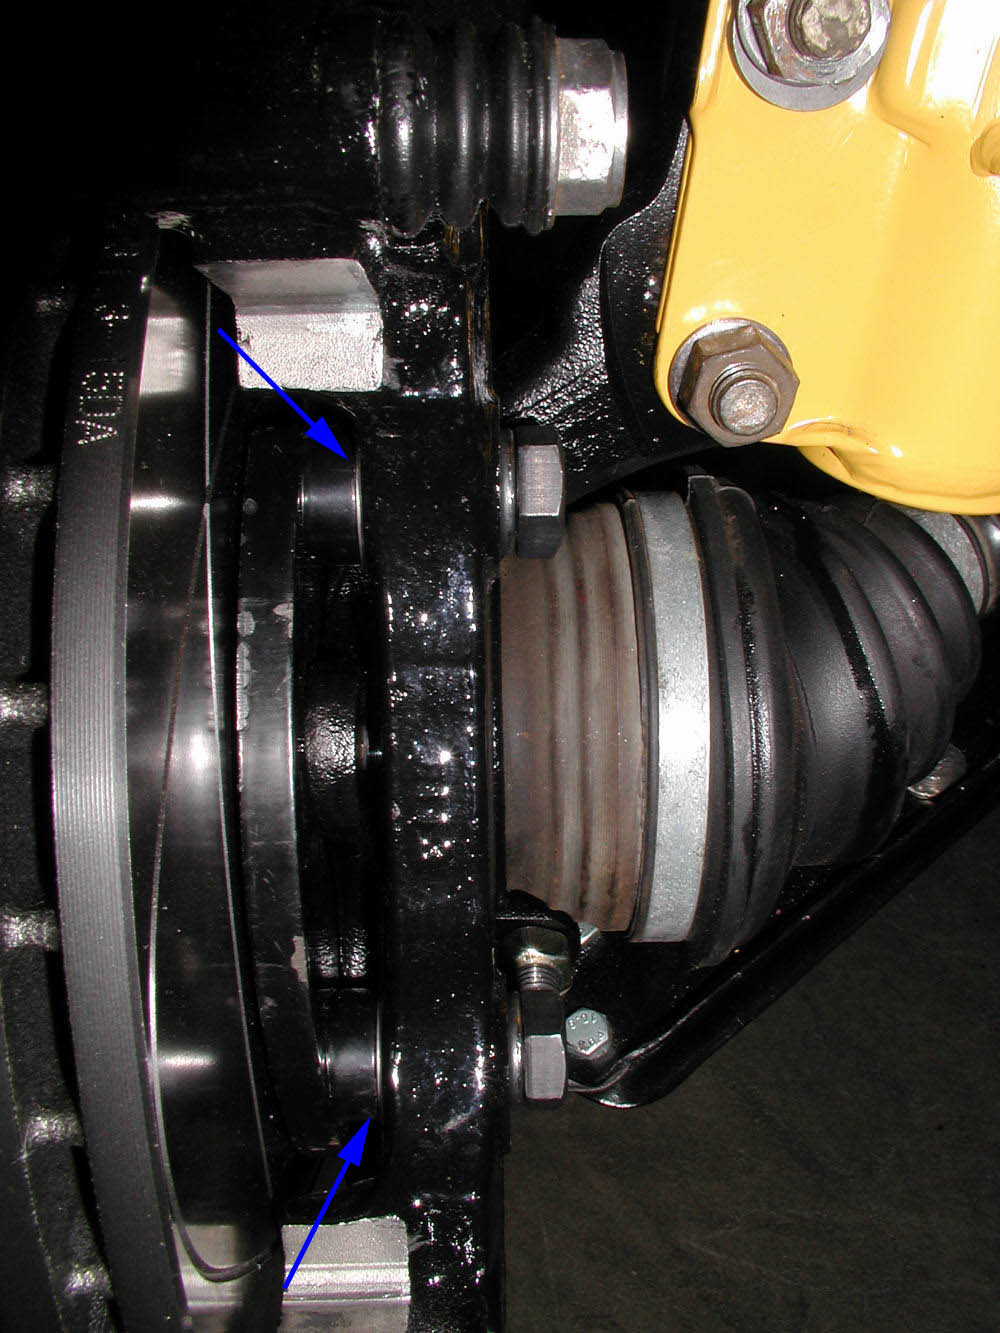
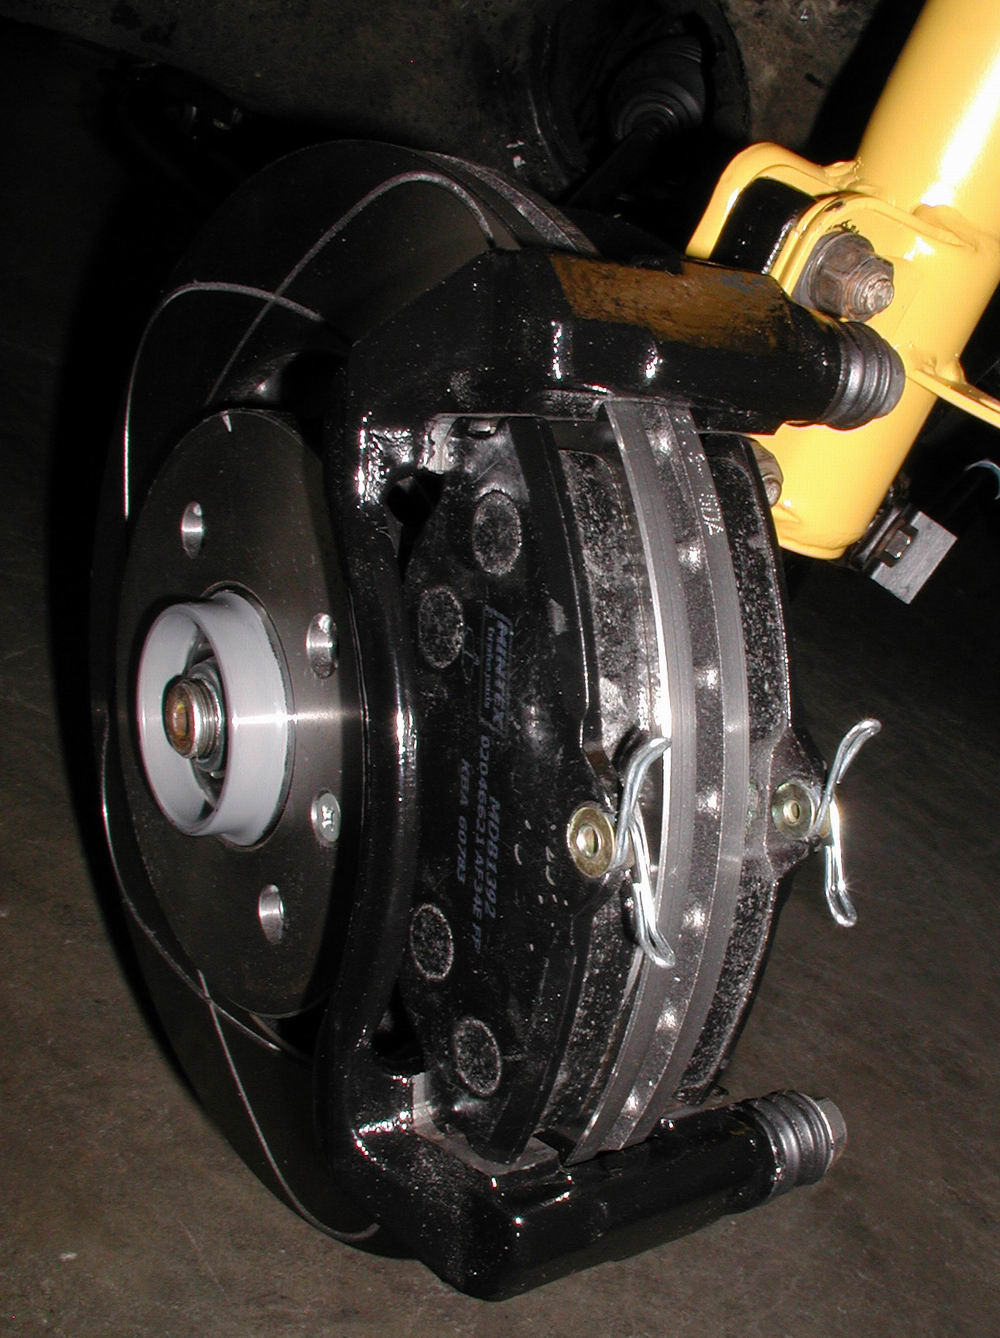
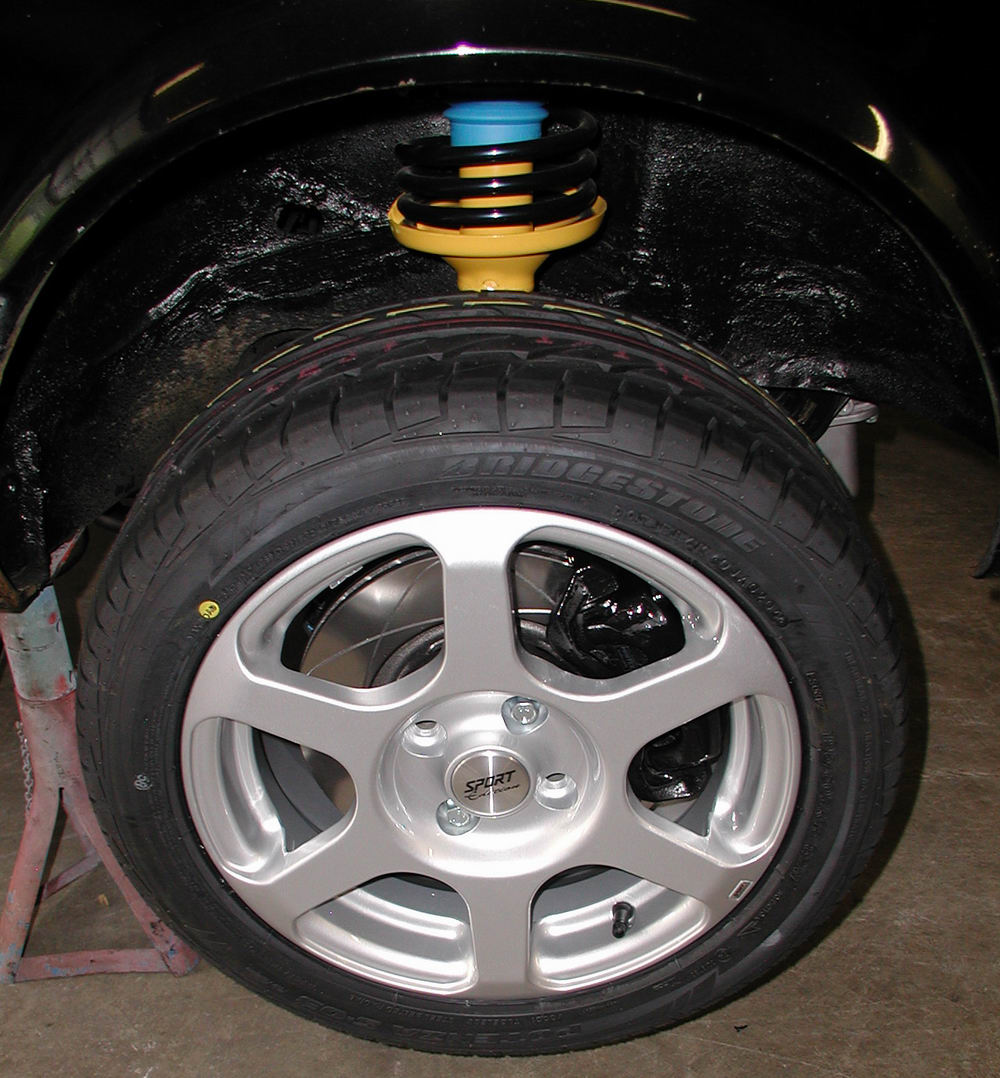
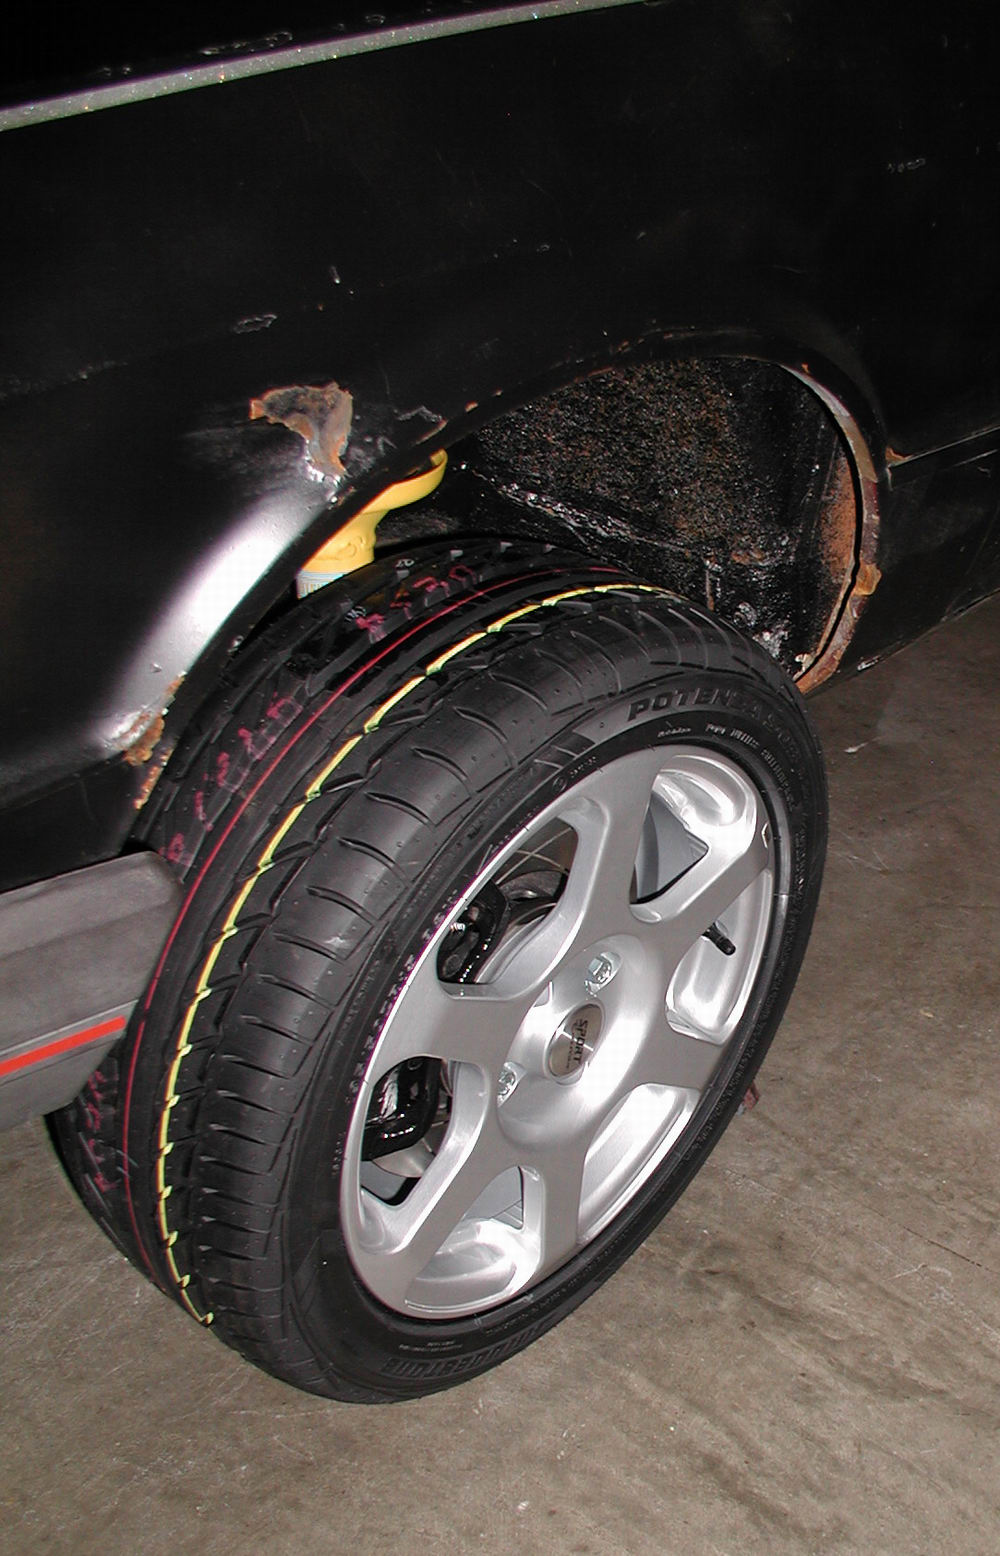
augustns047 (57K)

So, onto the front brakes.....

To fit the larger brakes, adapters had to be used between the hub carrier and caliper.  The adapters I got were designed to fit the Corrado G60 calipers onto the A1...not the Audi calipers that I was using. The problem was that the adapters didn't line up with the holes on the calipers once the brake pads were in place.


So, to allow the G60 caliper adapters to fit with the Audi calipers, Dan cut one of the brake pads down on each side.

augustns051 (14K) augustns052 (15K)
augustns053 (22K)

With that hurdle crossed, Dan and I set out to install the front brakes.  Here you can see all the parts and tools needed to install Shocky's new brakes:

augustns054 (41K) augustns055 (39K)

So, first thing to do was install the caliper adapter onto the hub carrier:

augustns056 (62K)
augustns057 (36K)

augustns058 (42K)
augustns059 (59K)

Followed by the beautiful 11" rotor.....

augustns060 (62K)  

...and then the caliper carrier.....

augustns062 (55K) augustns063 (39K)

...which didn't fit very snuggly, so Dan and I used the shims that came with the caliper adapters to shim the bolts that attach the caliper to the adapter:

augustns064 (30K)

augustns066 (54K)

After the shims were in place, the caliper carrier fit quite nicely so it was on to the brake pads:

augustns067 (66K) augustns068 (52K)
augustns069 (48K) augustns070 (62K)

...and finally, the caliper joins the team, after I applied some loc-tite to the bolts:

augustns071 (28K)
augustns072 (53K) augustns073 (43K)
augustns074 (68K) As nice as the dual piston calipers are, they really are amazingly heavy (7 lbs each!).  Which is unfortunate....perhaps in a future upgrade to the brake system I will look into a lighter pair of calipers.....

And here you can see one of the stainless steel brake lines I got from Autotech in action......

augustns075 (59K) augustns077 (41K)
augustns078 (45K) augustns079 (42K)

....and that's it for the front brake install.  I think that Shocky's new wheels and tires look quite spiffy with the very pornographic rotor peeking out from the inside....

augustns080 (43K) augustns081 (44K)
augustns082 (53K) augustns083 (46K)

BUT!  That wasn't it for the brake system....nosiree.....

The hard brake lines going to the master cylinder had to be fabricated anew because they no longer reached the MC due to the addition of the proportioning valves on top (and the old brake lines were quite icky too!)

augustns084 (50K) augustns085 (49K)
augustns086 (55K)
augustns088 (46K) augustns089 (49K)

So, there you have it.....Shocky now has wonderful stopping power!  A perfect match for his wonderful power output

...and that was it for the August non engine swap related projects.....


PREVIOUS
INDEX
NEXT


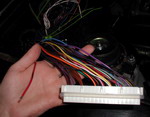
August Wiring Progress

SHOCKY JR.'S RESTORATION AND UPGRADE ADVENTURE CHRONICLES


October Swap Related Progress


No navigation frame to your left?  Click Here: